Many of the larger multifunction printer/copier/scanners like the Ricoh, Kyocera and Xerox machines offer print tracking and secure printing. Implementing this functionality is done on a per printer department and is typically set up by the manufacturer and maintained by your department administrator. Below is some general guidance, but if you don't know your code you may need to consult with your department administrator.
Print tracking allows a department to track how much printing is done by a group or individual. Secure printing gives you the option to secure a printed document with a code that must be input on the printer itself before it is printed (avoiding confidential documents sitting around at the printer).
Install the printer on a PC:
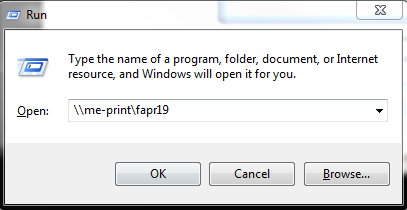
Step 1: On your keyboard hold down the Windows button and type the letter r. The Run window will appear (as below). In the Open line type the following text: \\me-print\fapr19 Then click the OK button.
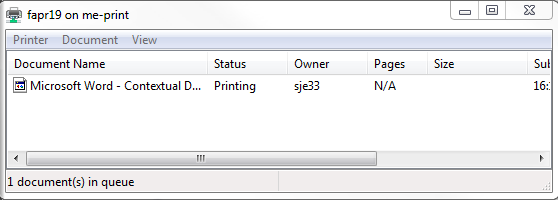
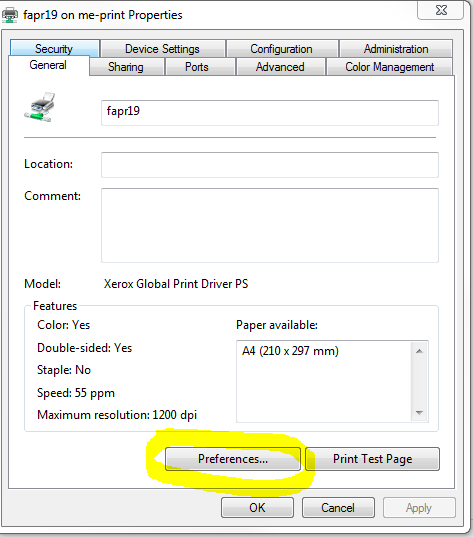
The printer will install and the printer window will open up on your computer. In the menu, click Printer and then choose Properties.
The window below will appear. Click on Preferences (circled in yellow).
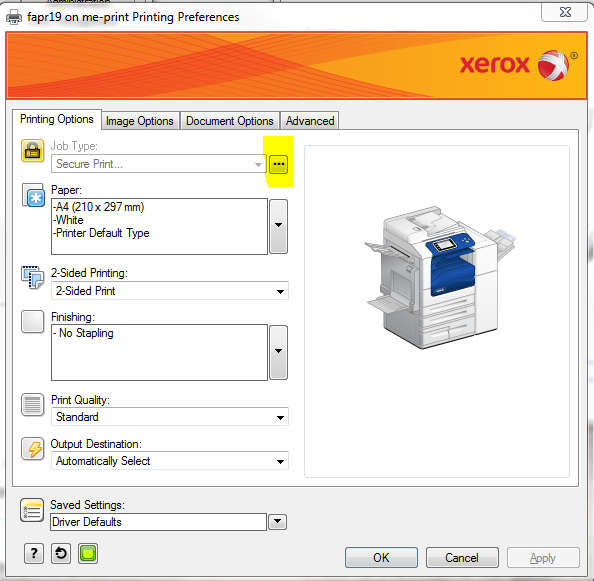
Step 2: Click on the ellipsis button (...) beside Secure print (highlighted in yellow on the screenshot below).
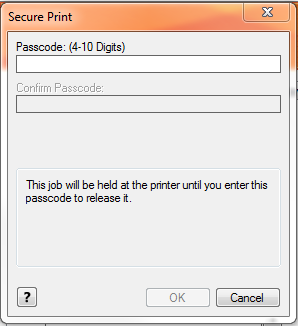
You will be prompted to set a secure code that you will need to use to release print jobs from the printer. Type in a 4-10 digit code and confirm it. Click OK and close all the windows
To print a document:
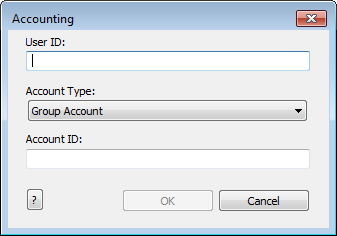
Print from the application as you normally do. If you are prompted with the Accounting window, make sure that you enter your User ID, select your Account Type as "Group Account" (NOT "default group account" in the drop down menu and enter your Account ID in the next field (this information was given to you by the printer Administrator and is NOT your secure code you set up). Note that once you have entered this information, it will be automatically saved for you the next time you print.
Go to the printer and release the job by selecting the third button down on the far left of the photocopier screen. Select the tab Secure Print jobs, find your print job and select it. Then enter the secure print code you made in step 2 above. Push the release job button found towards the top right of screen.
- After installing the printer, navigate to the control panel, right click on the printer and select Preferences.
The window below will appear. Click on Preferences (circled in yellow).
- While on the My Tab tab, select theAuthentication/Account Track...option, you may need to scroll down to find this.
- In the User Authentication section on the left please input your username and user print code provided by your departmental administrator.
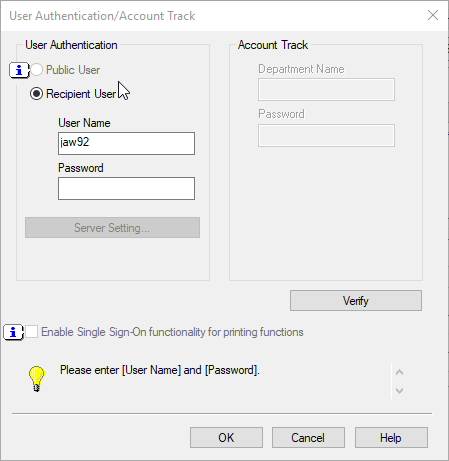
- Click Verify to confirm your settings
- Open a new Word document at the user’s computer and session.
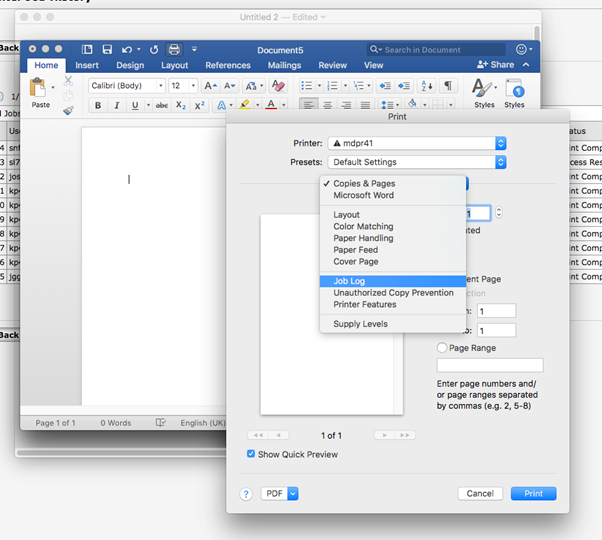
- Go to Print , Select the Printer and look for Job Log. Click on it.
- In User ID type your Username/
- Tick Enable User Code and type the user print code provided by your departmental administrator.
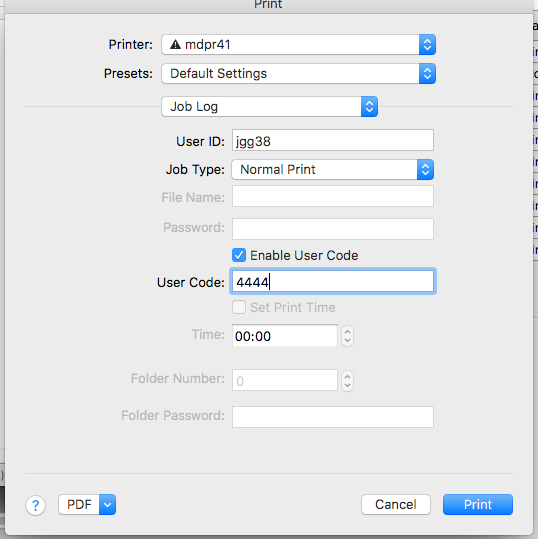
- Now, you should be able to print.
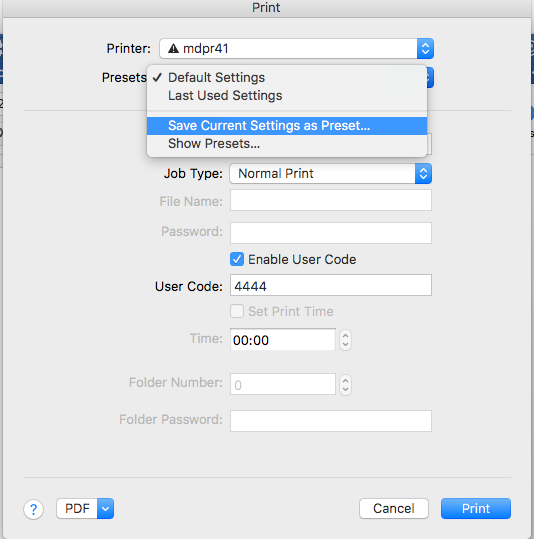
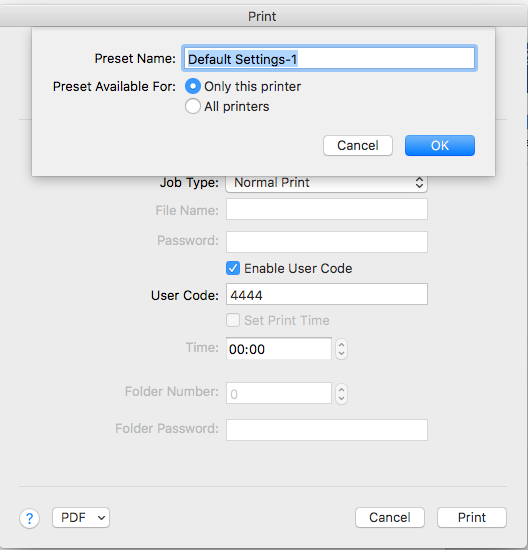
It is also advisable to save these printer configuration settings for further printing jobs. To do that, display the whole Presets field, and click on Save Current Settings as Preset. Type a name for the settings and click OK.