Email: Outlook Web App (OWA)
Introduction
Microsoft has a new webmail application called Outlook Web App (OWA), that allows you to access your email, calendar and contacts via a web browser. CSCS has implemented OWA to make it possible for you to check your email from anywhere in the world, wherever you have an Internet connection. The purpose of this page is to highlight some of the features of the new webmail and how the interface has changed as part of the recent mail system upgrade.
Requirements
To log in to webmail you will need a Mints/SLCU user account and internet access.
Webmail is not intended to be used from a mobile device such as phone or tablet, if you would like to access your email, calendar and contacts on your mobile please see our FAQ page for instructions: CSCS Guides
Contents
The items below contain information on some of the most commonly queried elements of OWA, please select the item you would like more information on:
Medschl Specific Guides
How do I access OWA?
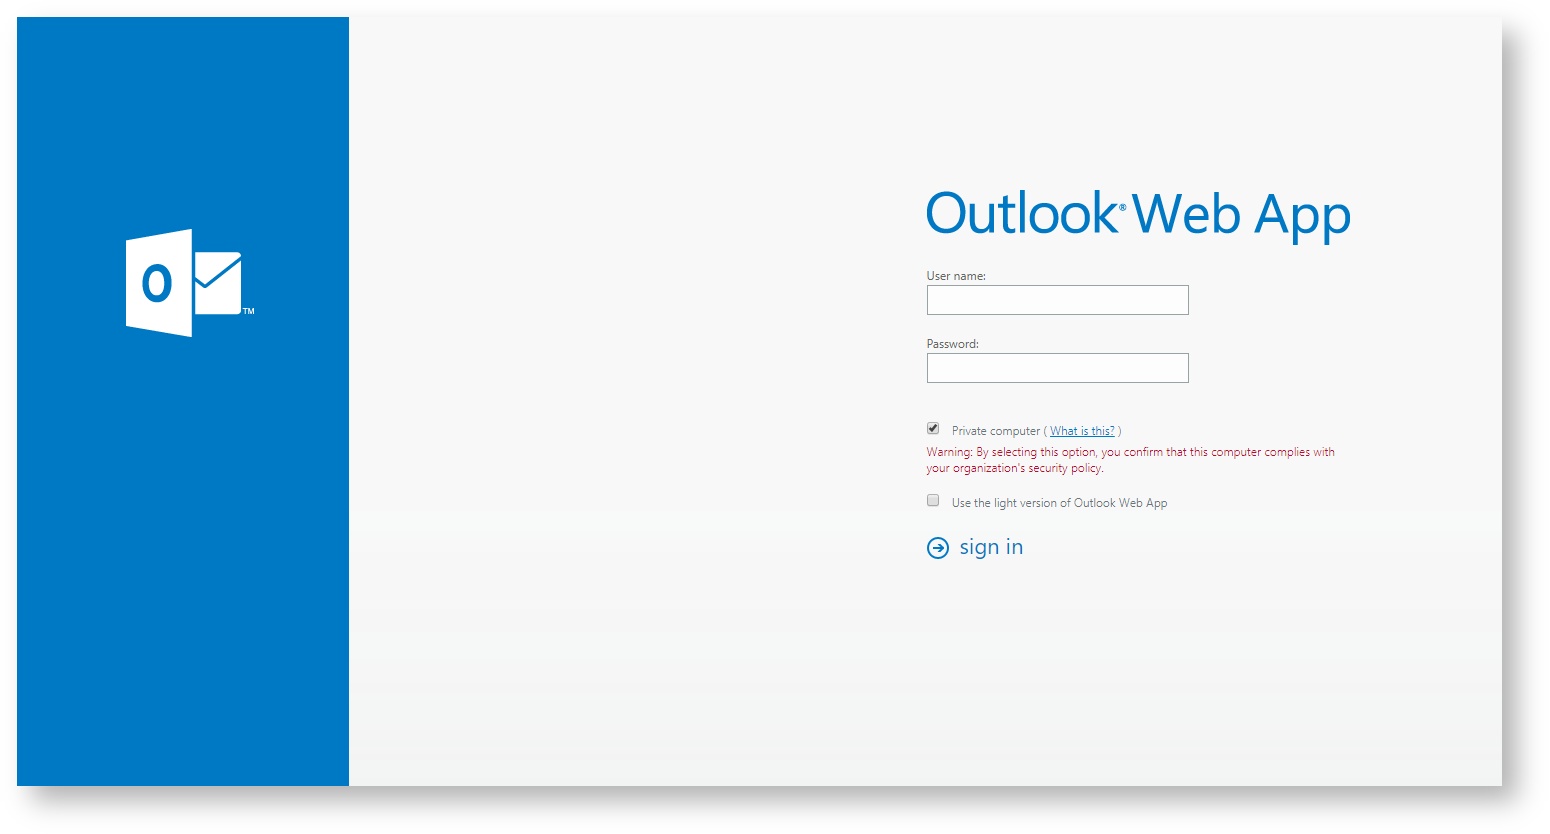
OWA is accessible via a web browser, using the following link: https://webmail.medschl.cam.ac.uk. You will be prompted for a username and password to access the service, which should be your Clinical School login credentials (not your Raven credentials). The interface has been updated to look more like the online Microsoft services now, with a large banner and simplified layout.
Please note:
- Webmail will automatically log you out if it is inactive to prevent unauthorised access. When you login you have an option to select either that you are using a public or shared computer or a private computer. This option will affect how long webmail can be inactive before you are automatically logged off. The timeout will be longer if you select private computer.
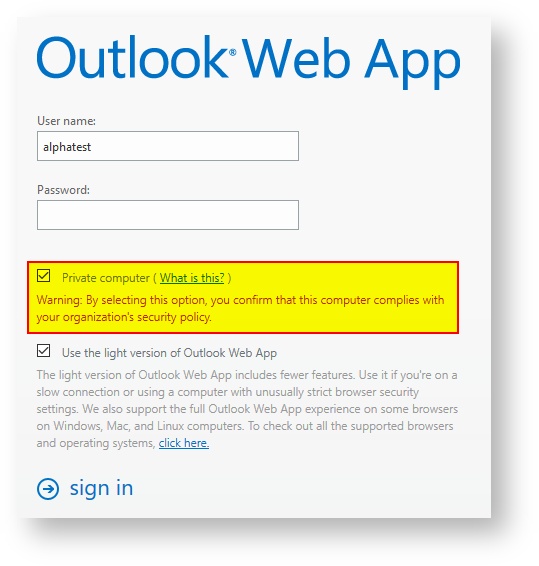
- You should only use the private computer option if you are not using a public or shared computer.
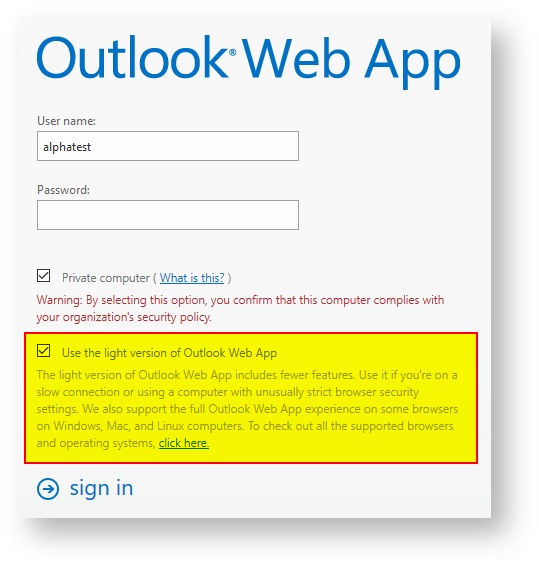
- The light version of Outlook is basically a faster more basic version of webmail. It does not have the features of the normal version but it is much faster so great to use if you are on a slow connection.
- To use the light version of webmail tick the Use the light version of Outlook Web App before you login.
How do I view and interact with my email?
When you log in, the first page that OWA loads is the email view by default. It has a similar layout to the Outlook mail client, with your inbox and any folder structure on the left hand side, and mail in the selected folder listed to the right of this. Once an email is selected from the list, the content will appear in the reading pane to the right:
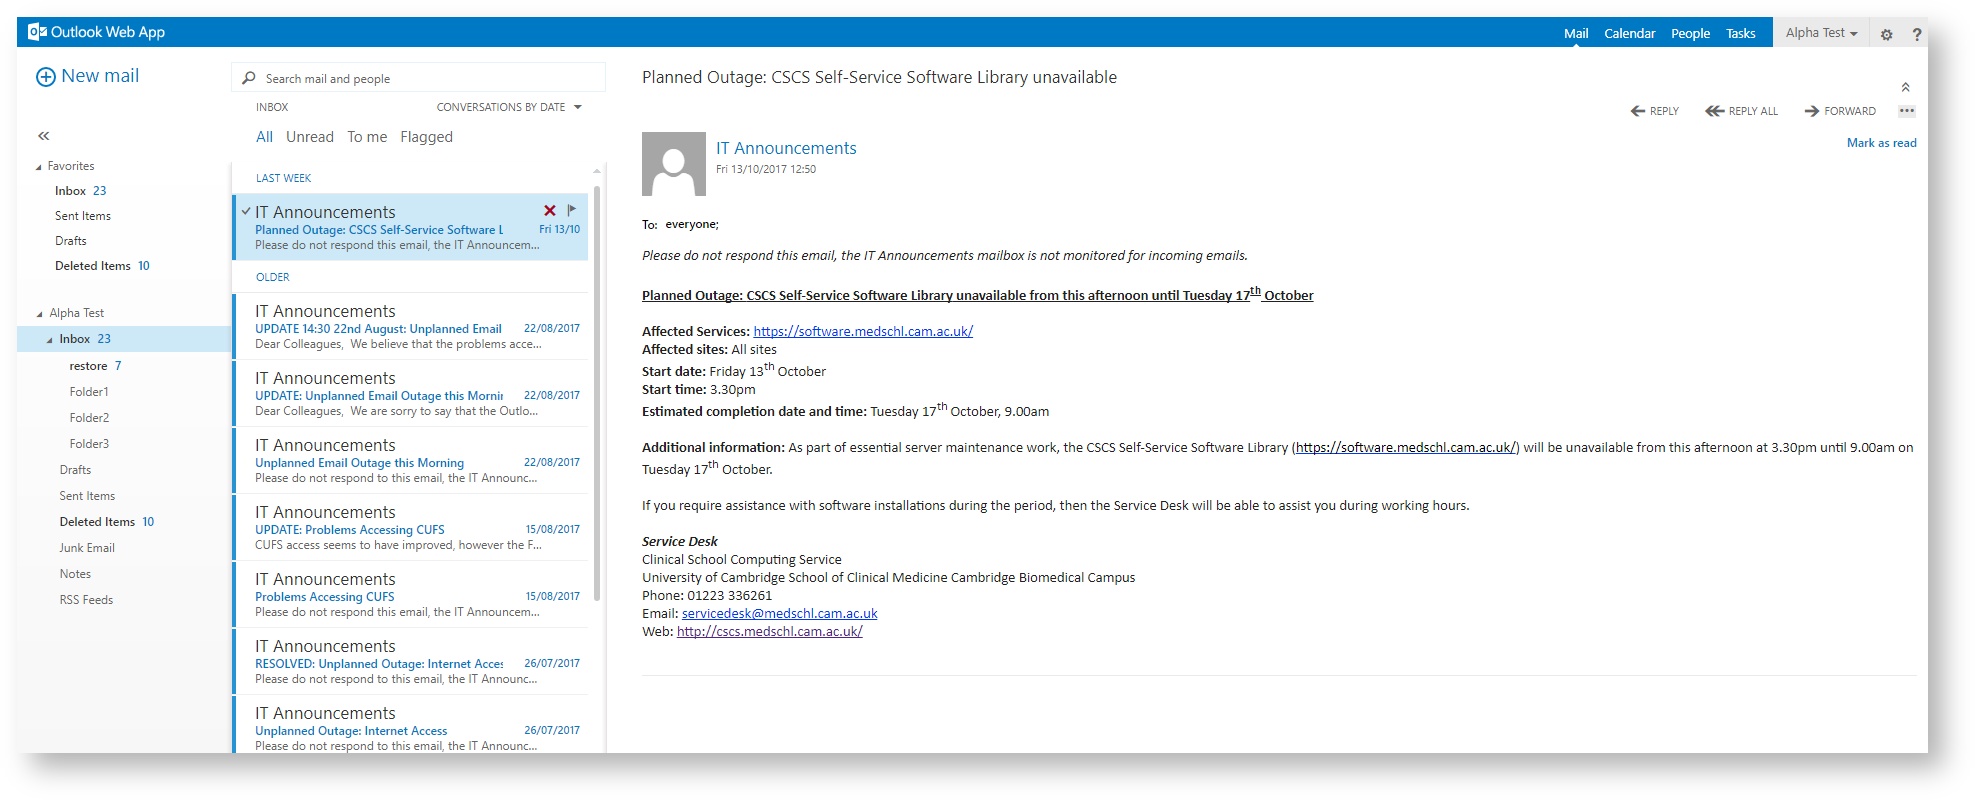
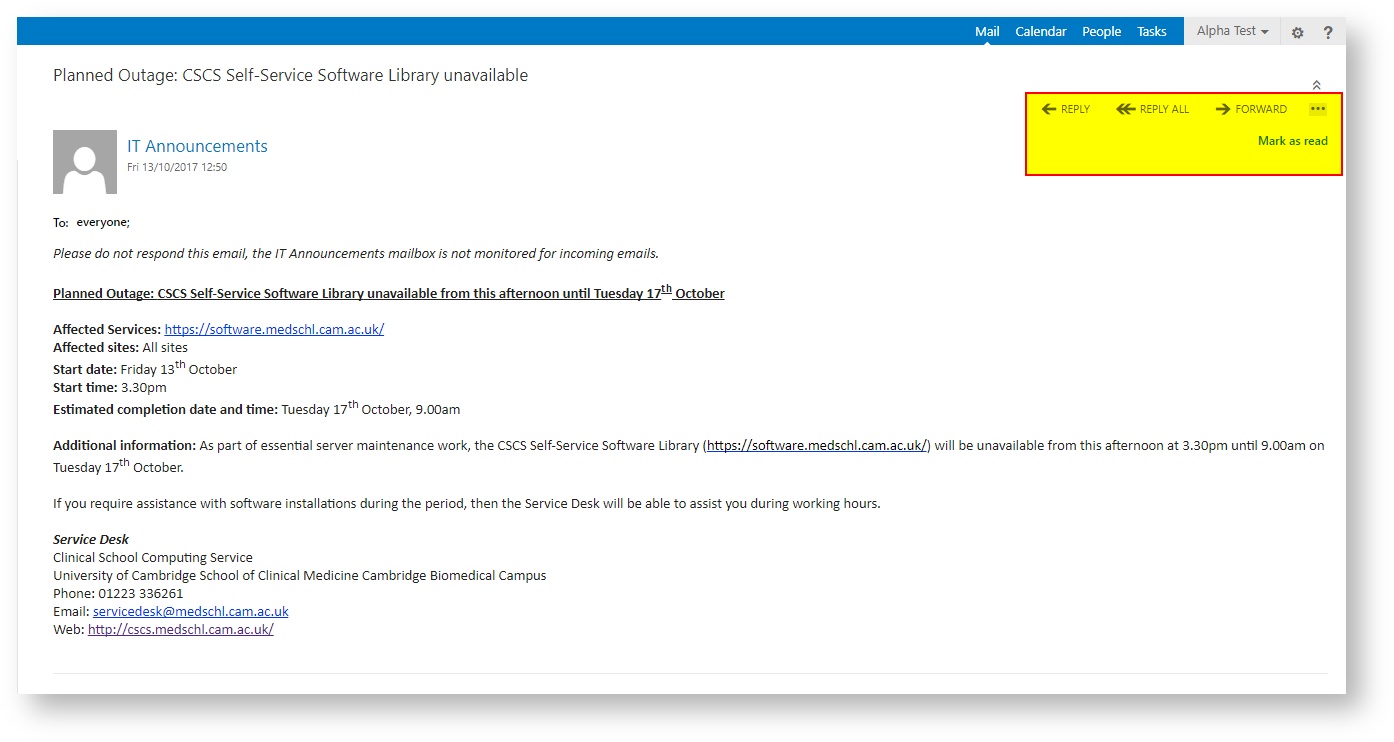
Options for replying, forwarding and otherwise interacting with the email are visible in the top right of the reading pane, underneath the top ribbon menu where your username is listed.
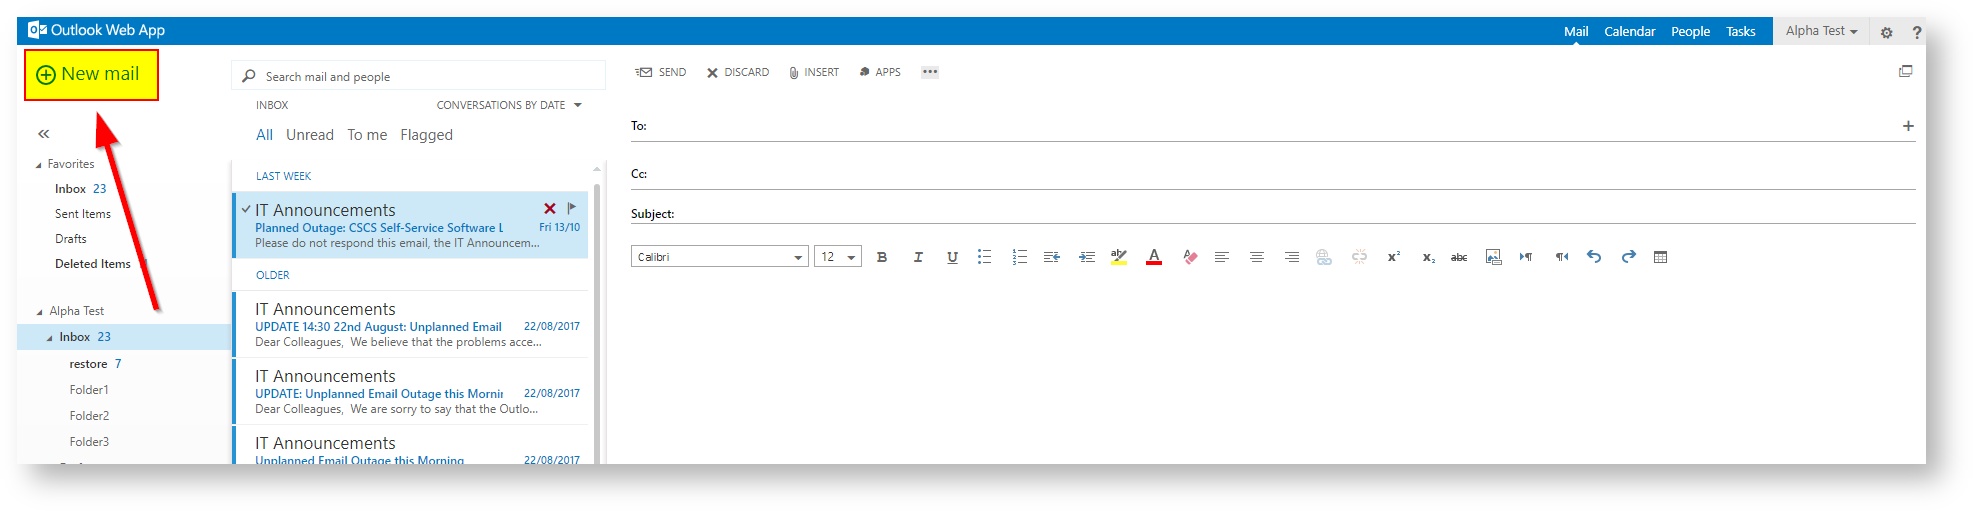
Creating a new email from scratch is done by using the new mail icon in the top left, which will convert the reading pane to be a new mail editor:
If you need to look someone up in the address book, this is available from the plus icon on the right side of the 'To:' field, bringing up the address book where you can search as required. People can be added to your list of recipients using the plus icon next to their name:
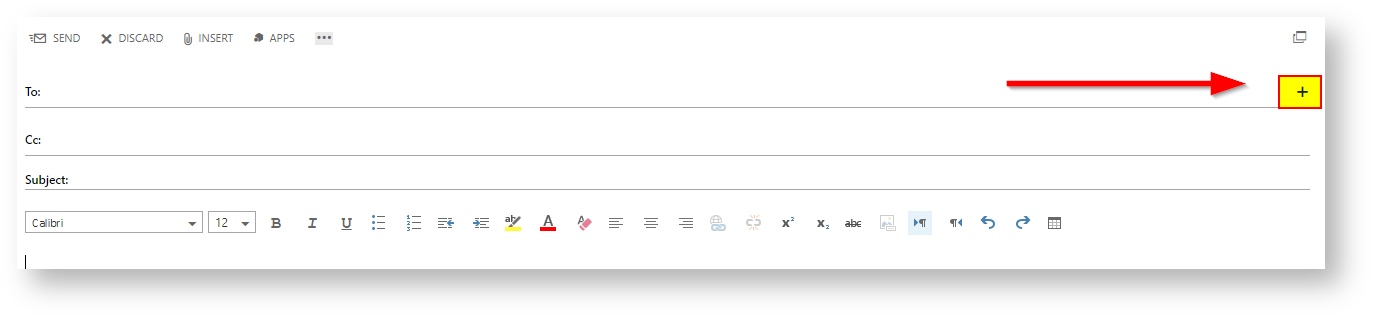
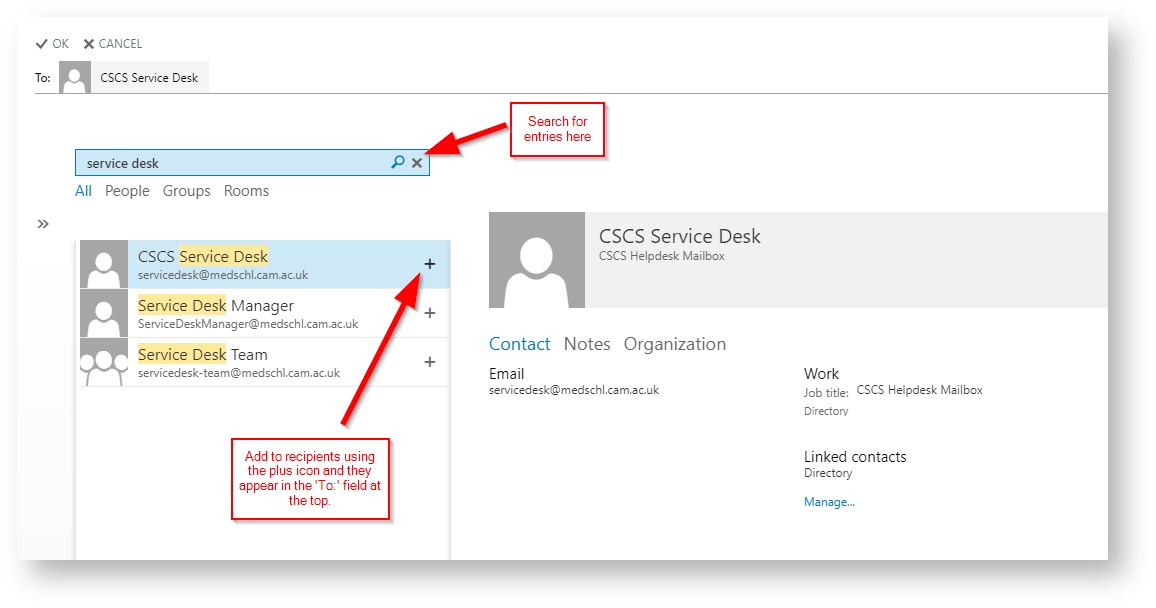
When you are finished adding people, you can select 'OK' from the top of the address book view to go back to your mail editor.
How do I view and interact with my calendar?
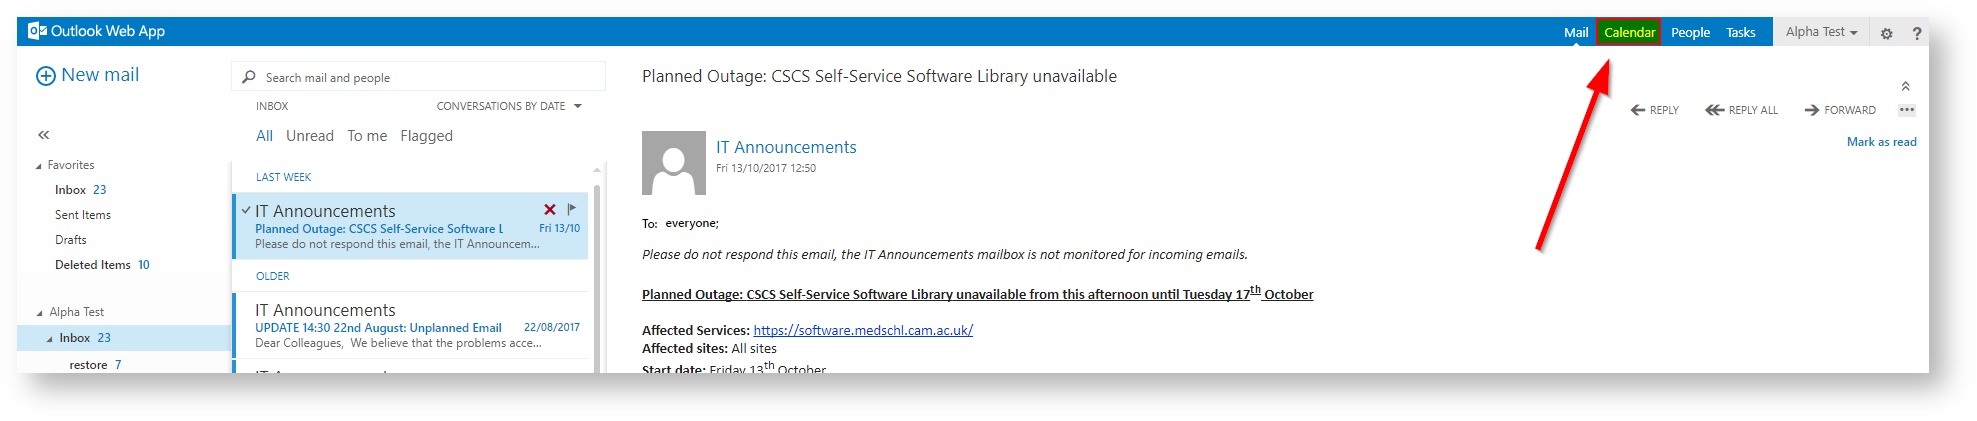
To switch from the email view to the calendar view, you can select the option from the top ribbon menu:
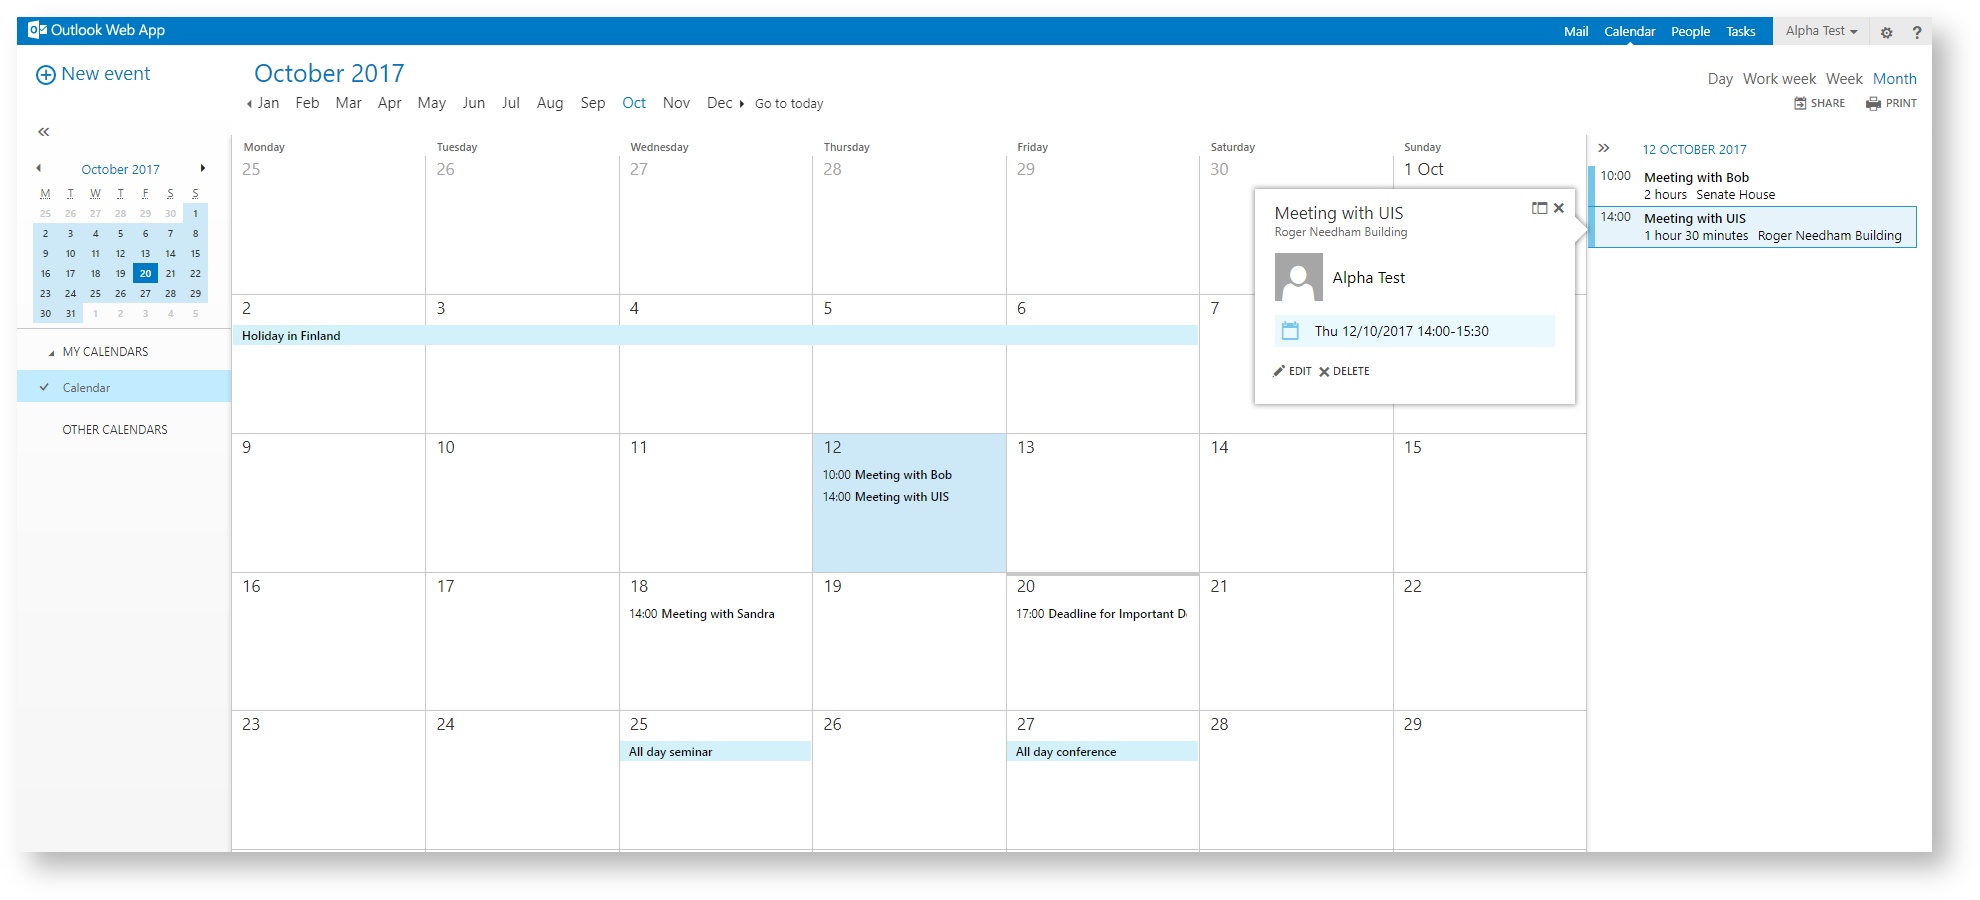
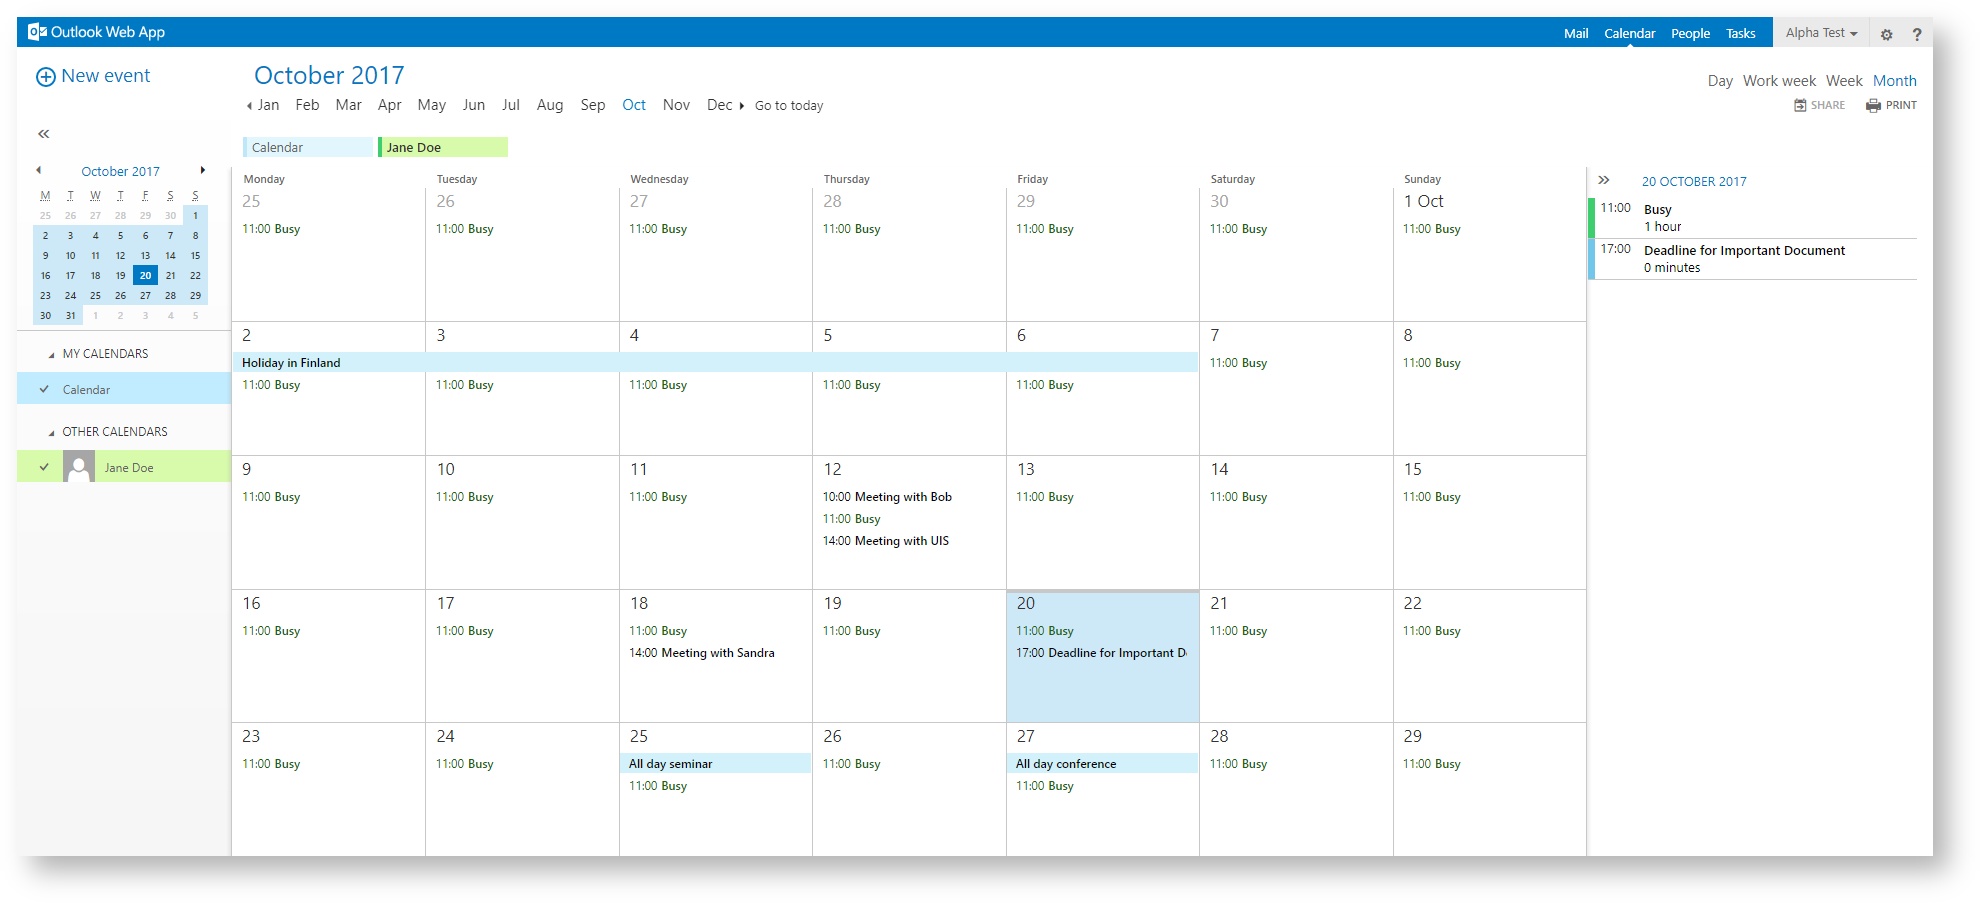
Once in the calendar view, the page will automatically load your calendar and show the current month and any reminders/events/meetings that you have listed on specific days. Entries with specific times have their title and start time shown in the overview, while all day entries are highlighted with a blue bar. By selecting a specific day, any entries will appear in the right hand pane to give you more information. These can be clicked on to show further detail if required.
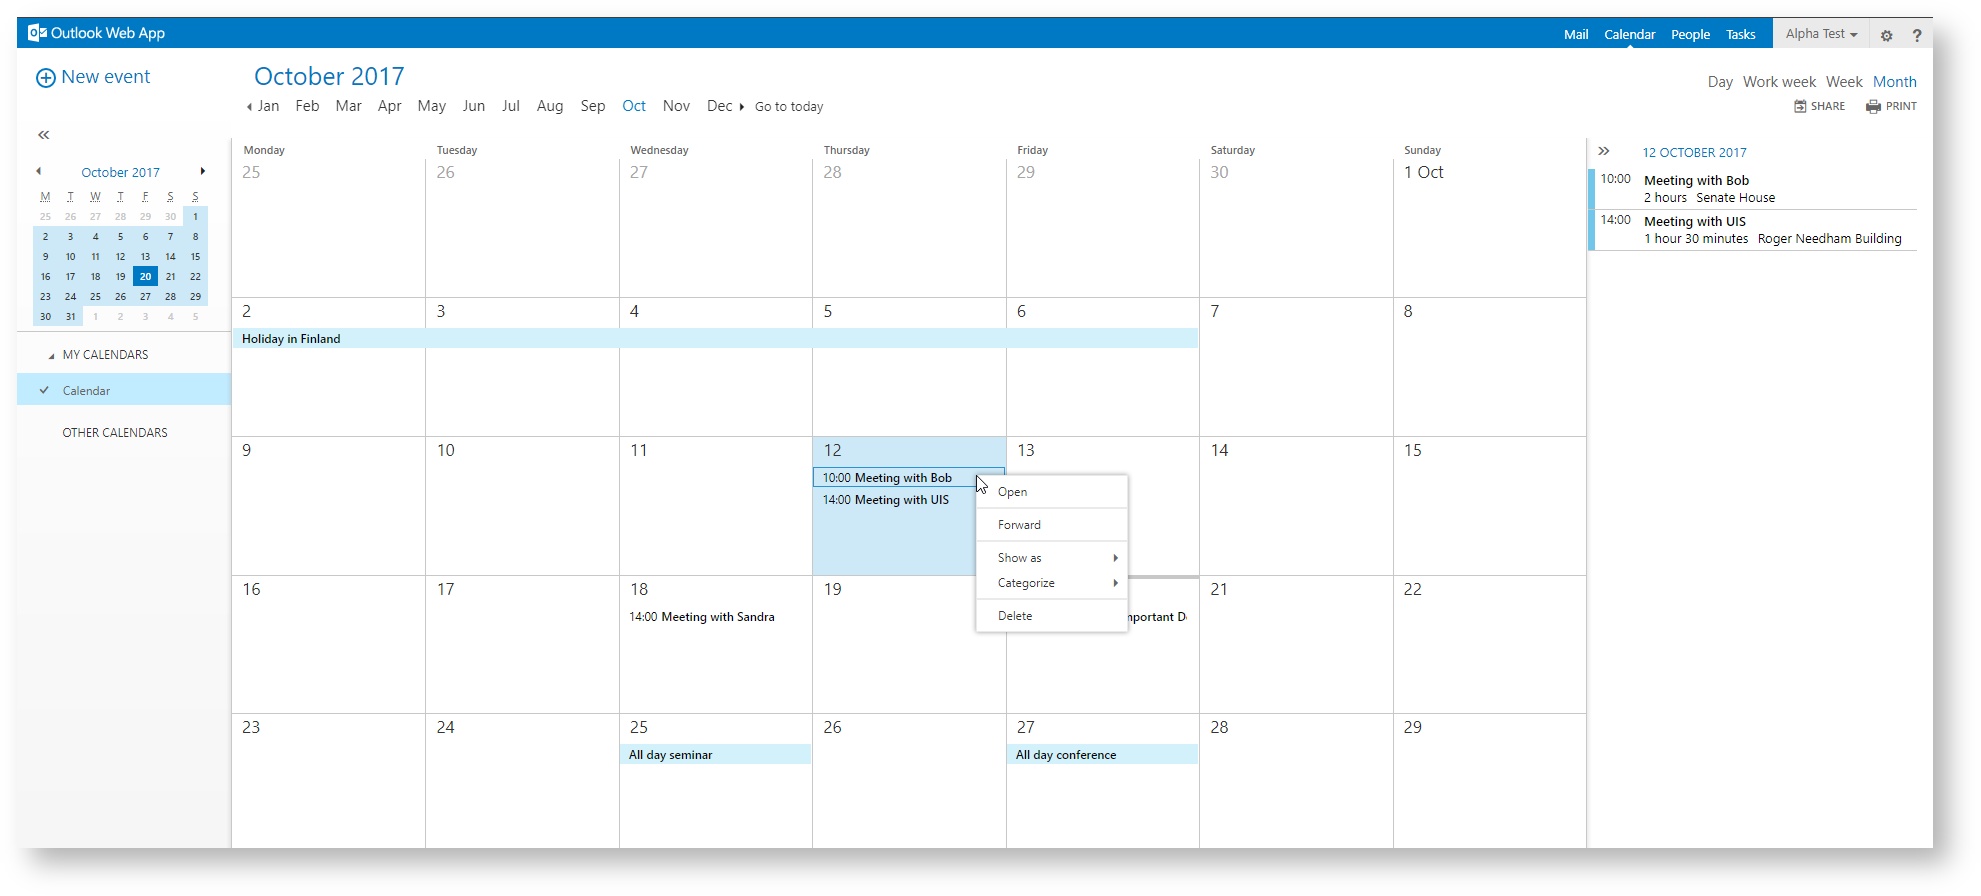
New calendar entries can be added by right-clicking on specific days and creating a new item, while existing entries can be edited in a similar manner.
How do I view another mailbox?
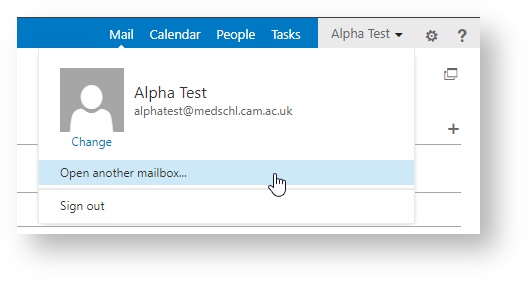
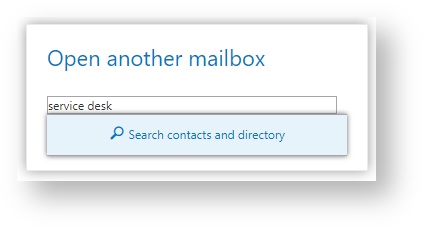
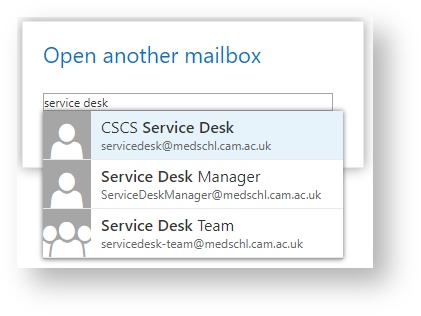
Some users may have access to another mailbox, such as a shared administrative mailbox. To access this from OWA, select your name from the top right of the web page and select 'Open another mailbox...'. You can type freely in the box that appears and search for the mailbox you wish to open by clicking the search box that appears as you type. From there you can select the mailbox you want, giving you the option to now open it:
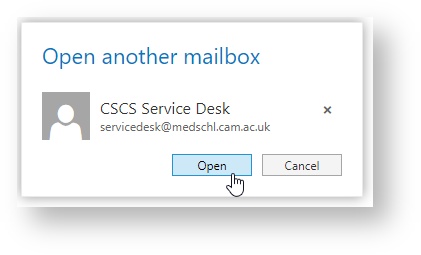
If you have permission to open this mailbox, then it will open as expected, however if you do not then you will receive an error.
How do I add another mailbox?
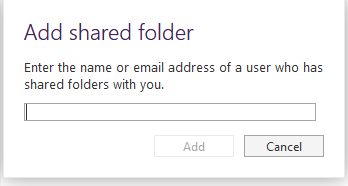
Some users may have access to shared mailboxes. To add them to your OWA, right click on your name on the left hand side and select "Add Shared Folder" Enter email address of shared mailbox.

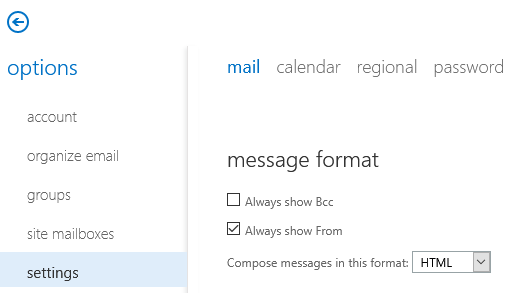
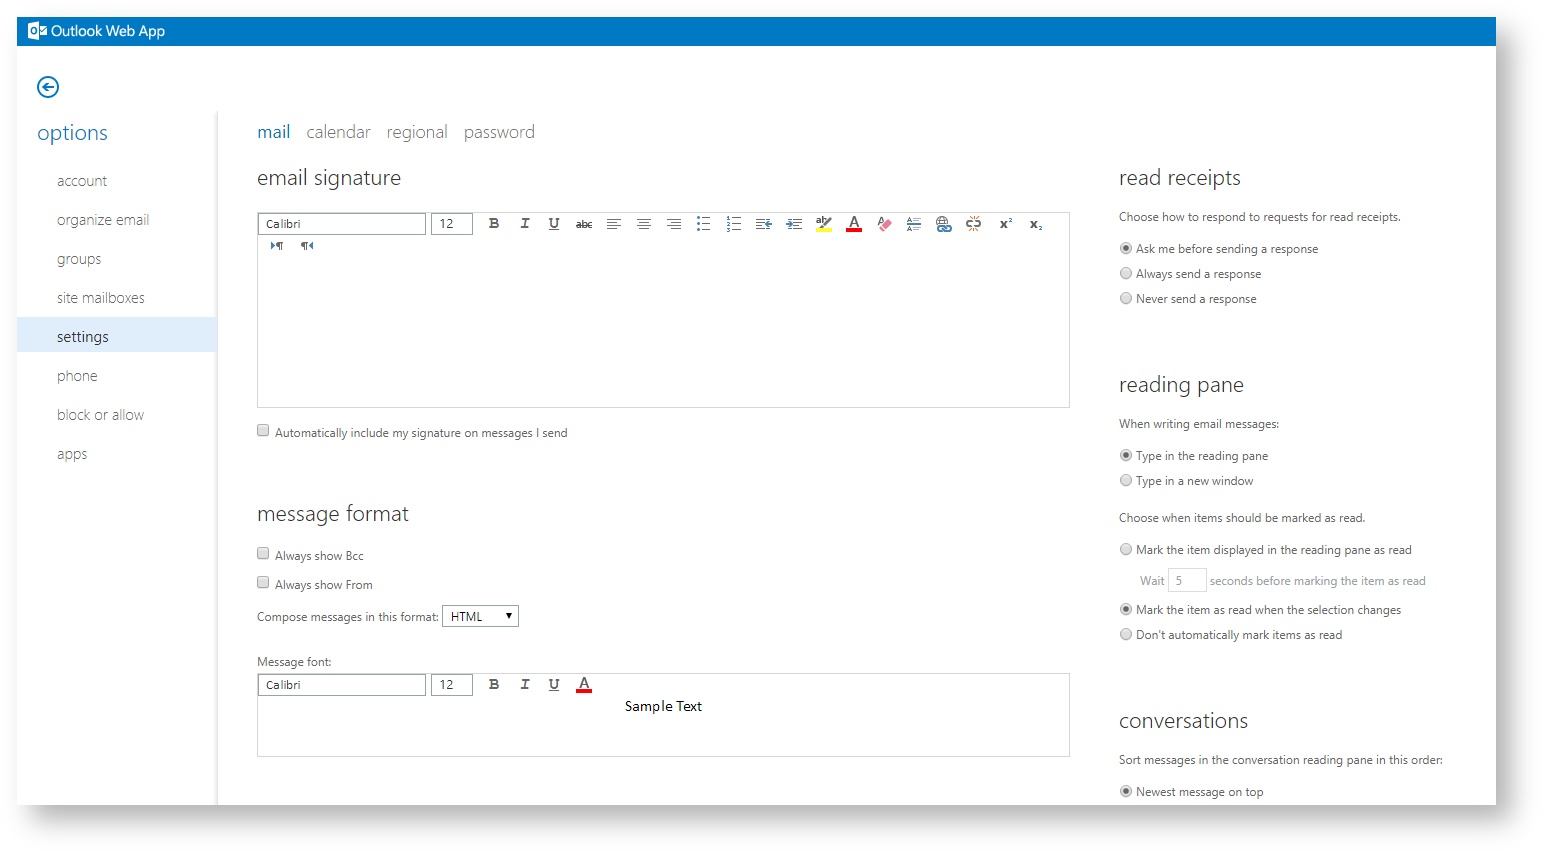
To enable the 'From' line, click the cog icon and select Options, then Settings on the left. Under 'Mail', tick "Always show From" (and "Always show Bcc" if you want)
To send from shared mailbox, select New Email.
If the wrong 'From' address is showing, click the small drop down arrow on the word 'From' and select the correct email address.
If it doesn’t show, click on the email address and delete it, you can then type the address to send from, and it should then appear under the little drop down arrow next time.
How do I connect to another calendar or share my own?
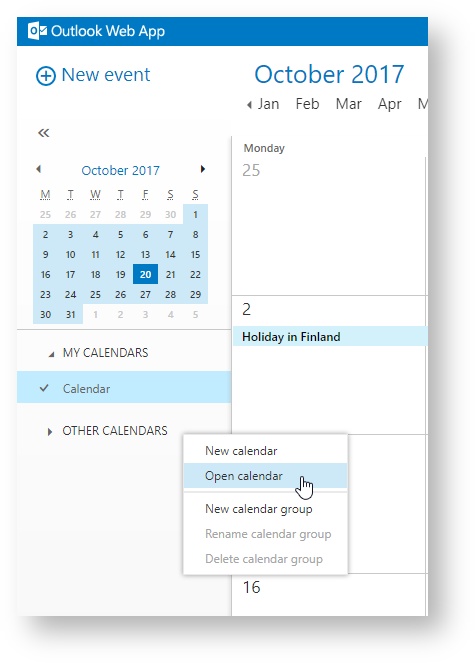
Some users may have access to a shared calendar, or have permission to view a colleague's calendar. To access this from OWA, first enter the calendar view from the top ribbon menu. Once in this view, right click on the 'Other Calendars' line in the left-hand pane and select 'open calendar':
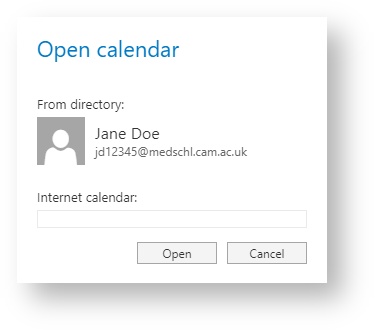
To open a calendar from the directory, such as a colleague's calendar or a shared calendar, type the name of the calendar you wish to open. This is usually the name of the user or the shared mailbox name where the calendar resides, then select the name or select the search box to bring up a list of potential matches to select from:

Select the user/shared mailbox you wish to open and it will appear in the open calendar dialogue box, where you can now select 'Open' to access the calendar:
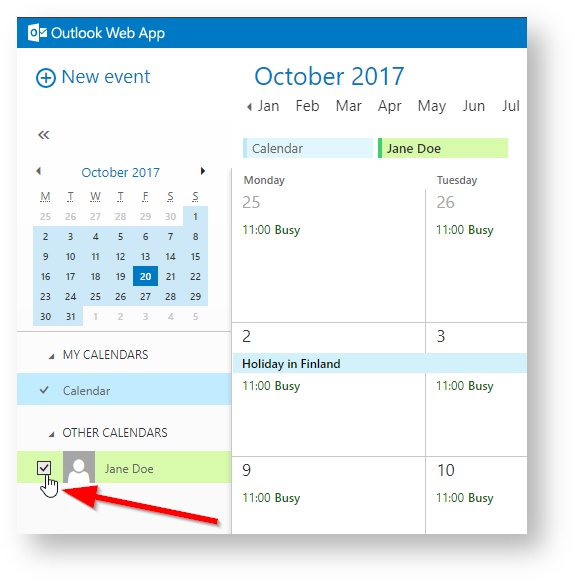
You will return to the main calendar view, with the new calendar opened and included in your view now. This will show you the other calendar in a different colour to your own (in the below example, your calendar is blue while Jane Doe's calendar is green):
You can select or deselect calendars so that they appear/disappear from your calendar by using the tick box control next to the calendar name:
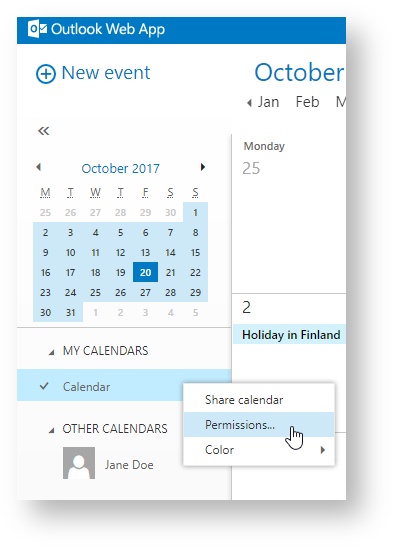
Please note that you can only view calendars that other users have given you access to, via delegating the right to you. If you wish to do this so that someone else can view your calendar, right click on your calendar in the left-hand pane and select 'Share calendar':

A menu screen will pop out from the right-hand side, asking who you would like to share your calendar with. This search box acts in a similar way to the previous ones, where typing a user's name and then pressing the search button will bring up a list of potential matches. Select one from the list and that user will be added to the sharing list, along with a drop-down menu of what level of calendar access you wish for them to be given: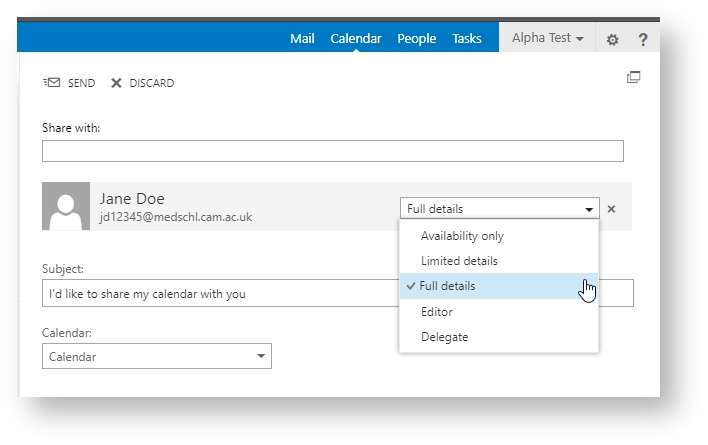
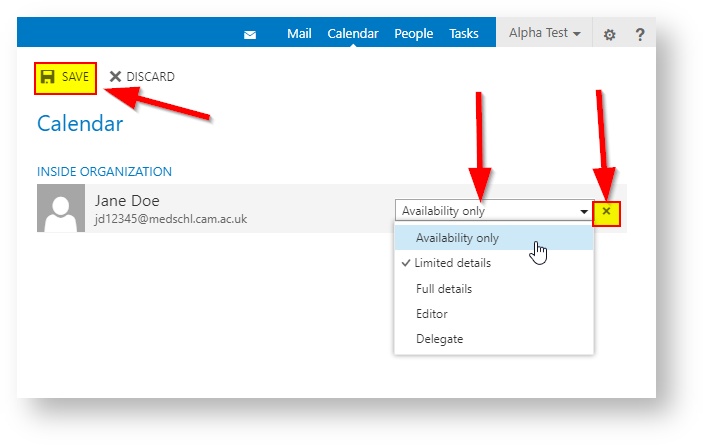
If you have multiple calendars then the correct one can be selected from the drop-down calendar list. The permissions structure for sharing your calendar is as follows:
- Availability only = The most restrictive, giving someone access to see only that you have a calendar entry but not what it is or what it contains (often just shown on their screen as 'busy', 'free', or 'out of office').
- Limited details = Gives all of the above, as well as access to see the title of your calendar entry.
- Full details = Gives all of the above, as well as access to see all details contained in your calendar entry (such as notes).
- Editor = Gives all of the above, as well as access to amend your calendar entries.
- Delegates = Gives full control of your calendar.
The last two options are often required by those who manage a calendar for another user, however they are the most permissive and should be used only when required.
When ready to give the user access to your calendar, press the 'send' button at the top. The user you have given permission to will receive an email letting them know that you would like to share your calendar with them.

If you would like to remove permissions someone else has to your calendar, simply right click on your calendar from the left-hand pane and select 'permissions':
A menu screen will pop out from the right-hand side, showing the users who have permissions relating to your calendar. You can change the level of permissions they have using the selection box, or remove them from your calendar entirely using the cross icon next to their name. When you have finished making changes, simply press 'save' at the top of this menu or 'discard' if you wish to cancel:
How do I change my email settings (i.e. Automatic Replies, Rules, Signatures, etc.)?
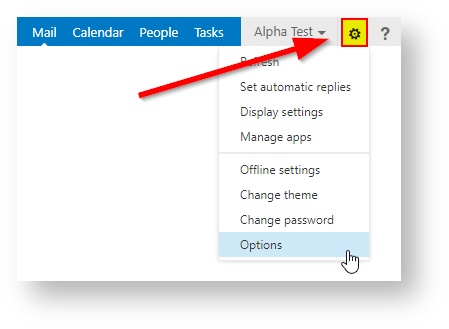
Options and email settings can be accessed by clicking on the cog wheel icon in the top-right of the screen, next to your name. There are some common options shortcuts listed in this drop-down menu in addition:
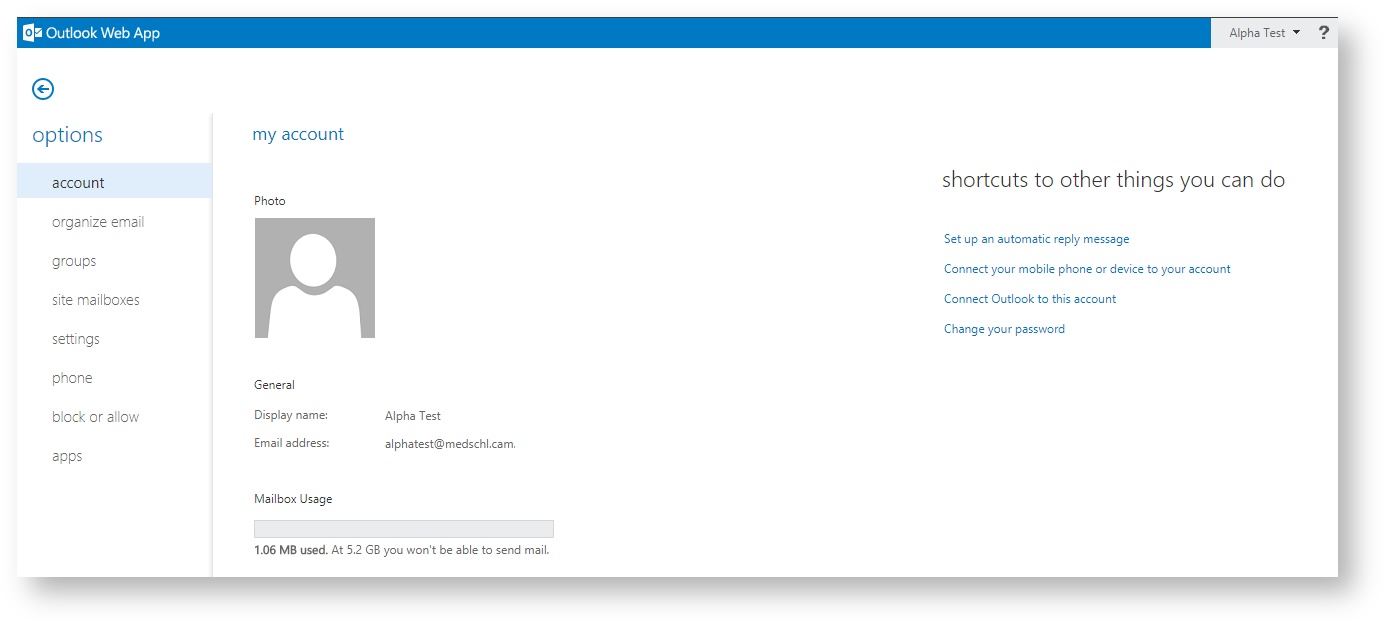
You will initially be taken to the account page, which shows your name, email address and mailbox usage statistics. From here there are convenient shortcuts to items such as setting up an automatic reply or changing your password if you need them.
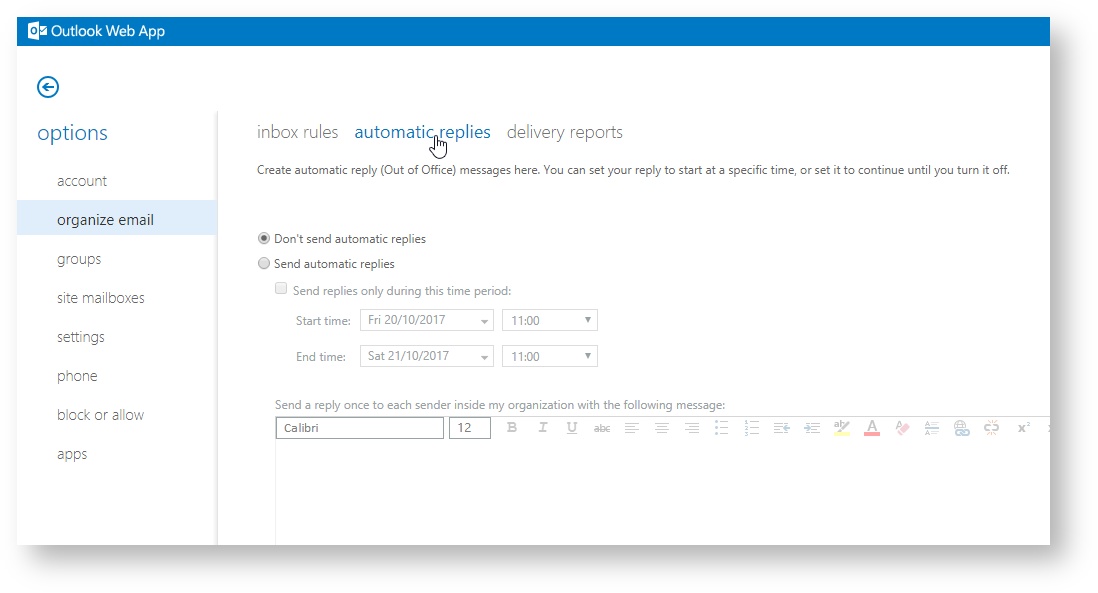
The most common pages people need to use are those that deal with automatic replies, rules and signatures (though there are more options pages available). Rules and automatic replies can be accessed from the 'organize email' view, selected on the left side:
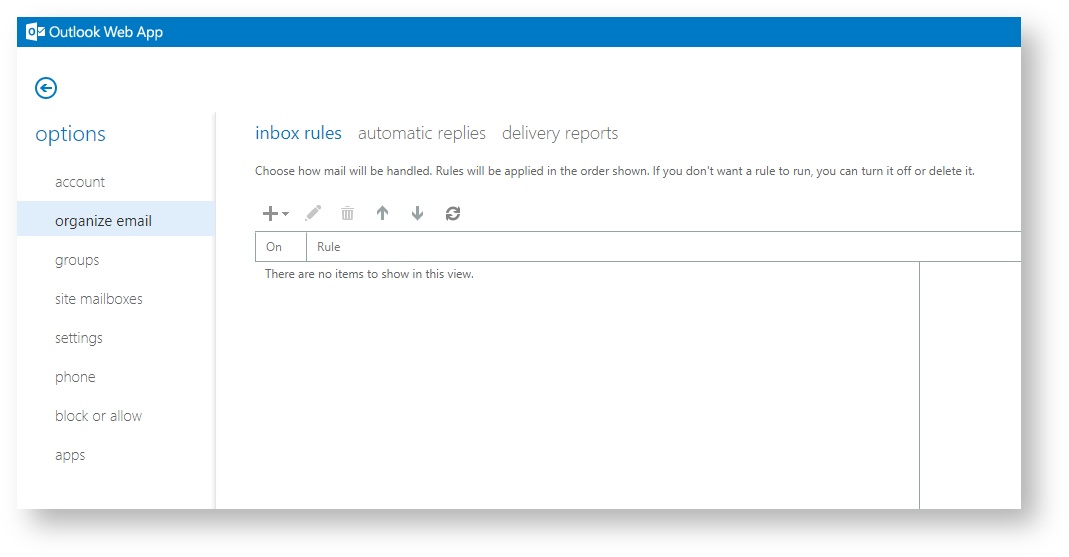
To switch between the option items available, such as inbox rules, automatic replies, or delivery reports, simply select the item you wish to work with by clicking on it:
To access email signature, calendar and password settings, select the 'settings' option from the left pane. These pages also include options to change how OWA appears:
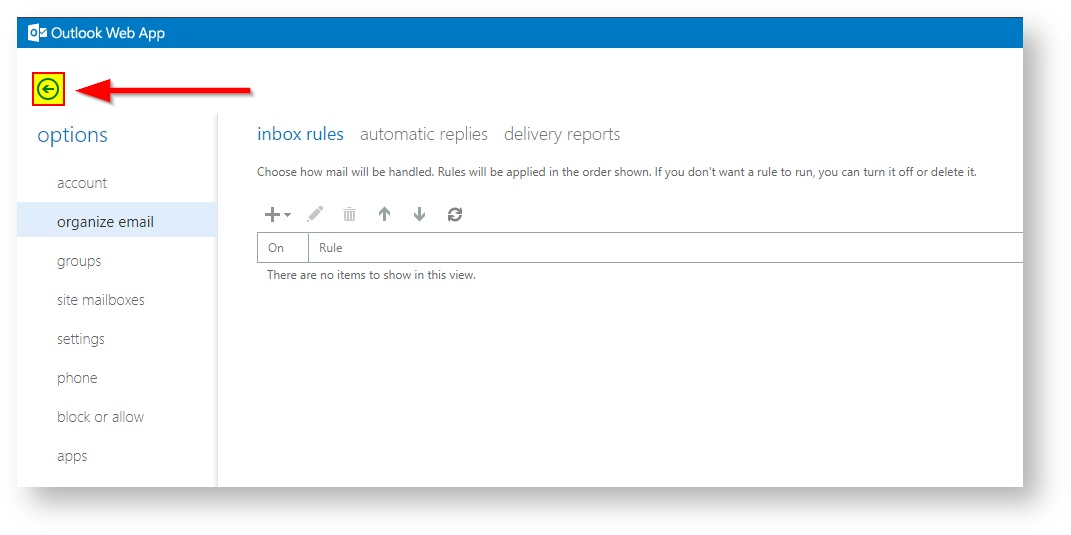
To go back to your email view, select the back arrow icon in the top left:
How do I log out of OWA?
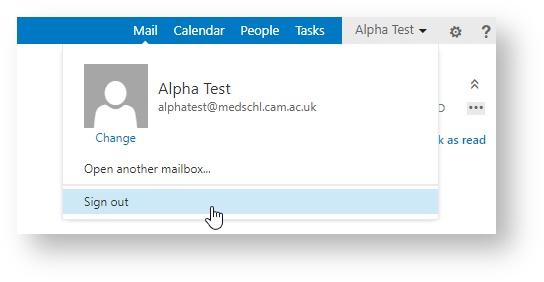
To log out, simply select your name from the top right of the ribbon menu and select the sign out option. You will be returned to the login page when you click this and your logout is completed:
How do I change my password using OWA?
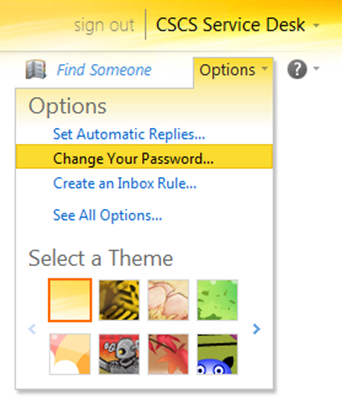
To change your password via OWA, select the cog icon in the top right next to your name and click on 'Change password'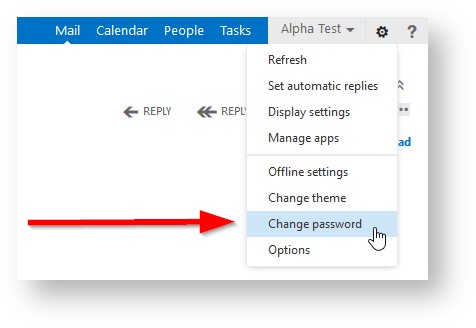
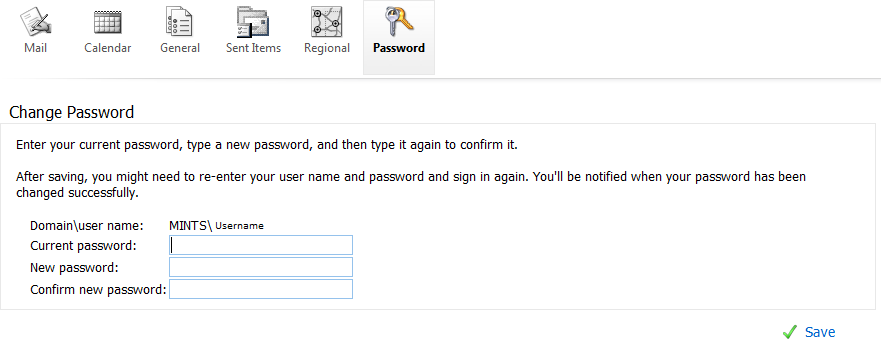
You will be taken to the change password page. You will need to enter your current password, then enter a new password in the 'New password' and 'Confirm new password' box.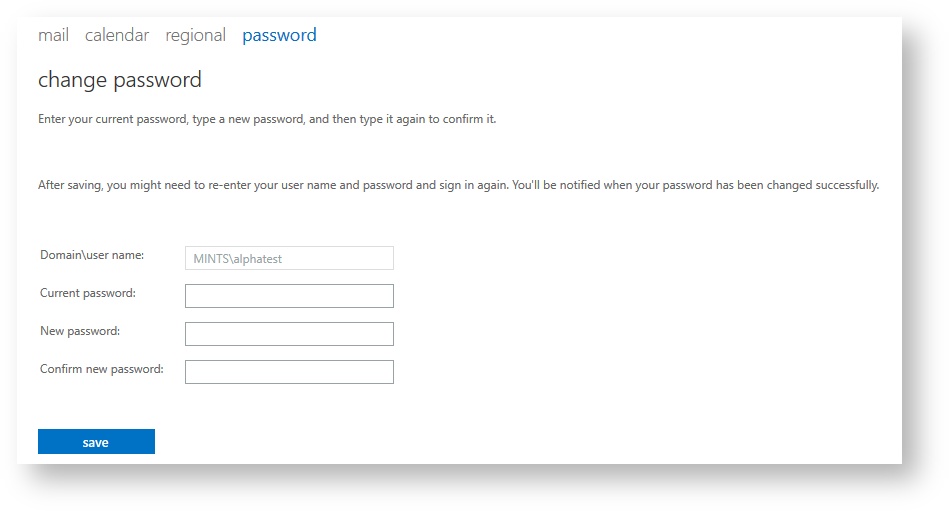
When you are finished, click 'save' at the bottom to change your password.
How can I get help on how to use OWA?
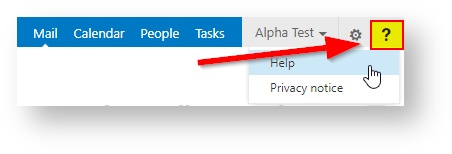
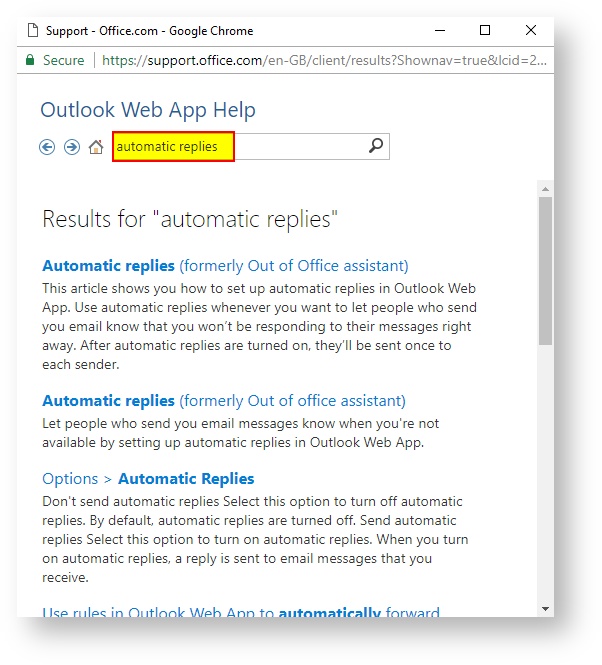
OWA includes a help system, which is accessible from the top right of the ribbon menu using the question mark icon, next to your name and the cog icon.
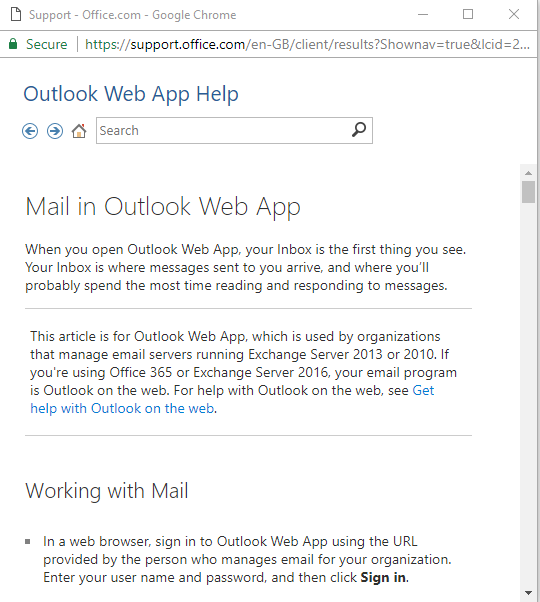
This will bring up a separate window containing the help system. This system is context sensitive, so if you access the help page when you are in the email view you will receive information on mail in OWA, while if you access it in the calendar view you will receive help on the calendar in OWA. You can also search for help articles you are looking for as well, if there is something specific you had in mind:
If you need further assistance, then please contact the CSCS Service Desk for advice - servicedesk@medschl.cam.ac.uk .
- Once you are logged in click on Options in the top right hand side of the window and select Change Your Password...
- Enter your current password and set a new one and click Save.
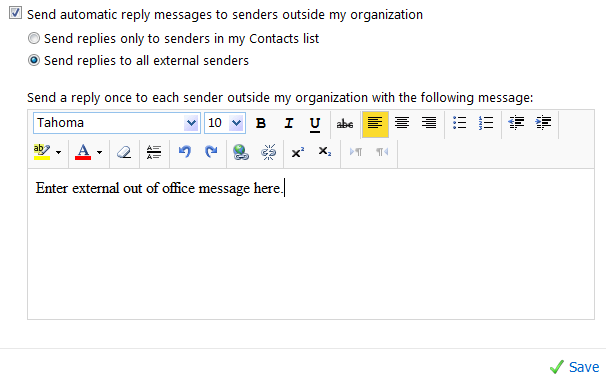
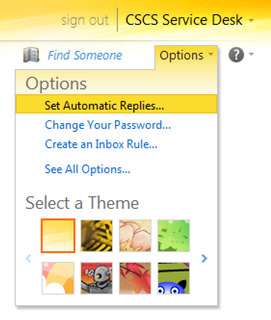
- Once your logged in click on Options in the top right hand side of the window and select Set Automatic Replies...
- You can now specify the date, time and message for you your out of office automatic reply.
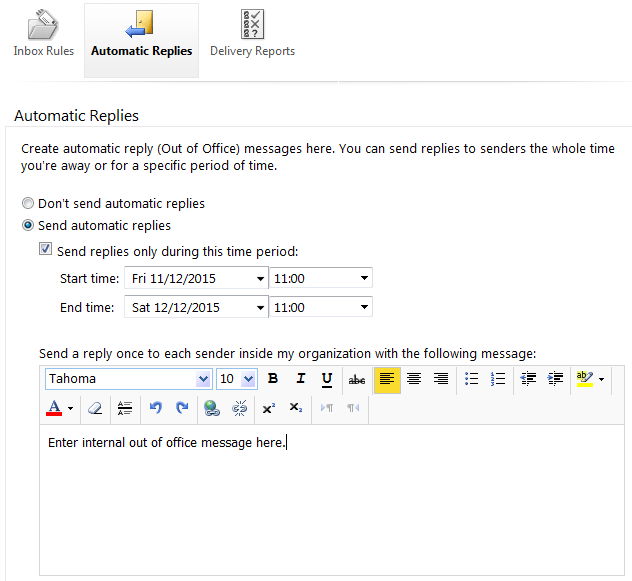
You can specify a different message to go to external senders.
You can specify a different message to go to external senders.