Troubleshooting SLCU_Wi-Fi
- Jamie Langford
- Dave Clarke
- Paul Gregory
- Martin Keen
Introduction
This guide is to resolve problems connecting to the SLCU_WiFi network that occurred after the network was renamed from SLCUtest to SLCU_Wi-Fi. Although server settings have been corrected testing has shown that some Windows 7 and Windows 10 clients are caching the incorrect settings from the previous network configuration, causing certificate and security errors to occur when connecting to the new network.
Error messages typically look like this:
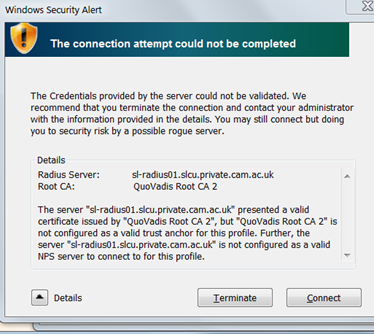
These instructions will guide you through clearing the cached settings and reconnecting with the correct ones.
Instructions
- Open the Start Menu
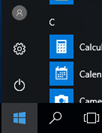
- Select the Settings menu icon (Cog) .

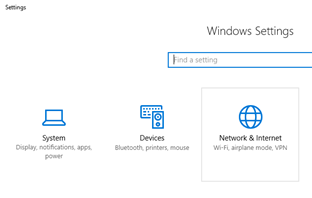
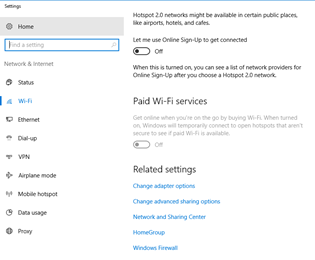
- Select the Network & Internet settings
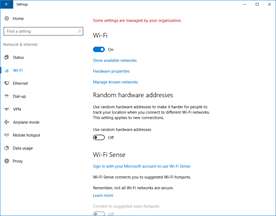
- Select Wi-Fi from the left hand side and from the Wi-Fi menu select Manage known networks
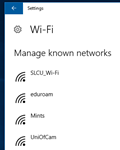
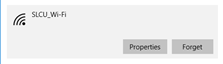
- If SLCUtest still exists select it and select Forget. Do the same for SLCU_Wi-Fi.
- Using the arrow at the top left of the window return to the Network & Internet menu.
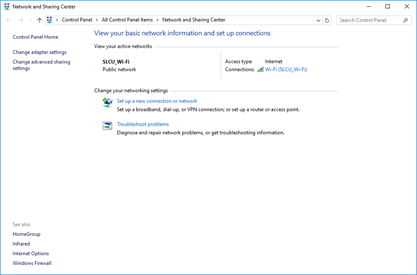
- Scroll down to the bottom of the screen and click Network and Sharing Center
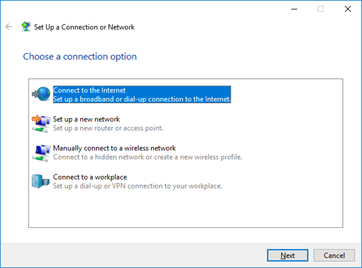
- Select Set up a new connection or network
- Then select Manually connect to a wireless network
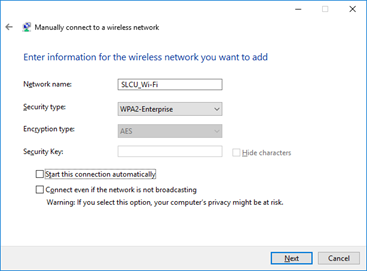
- Enter the details as below. You may also select the tick box to start this connection automatically
- If the Wi-Fi network still exists on the system a new pop up message will appear.
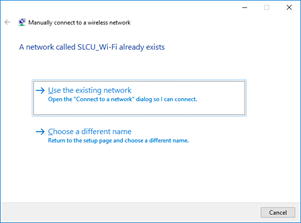
- Click use the existing network
- This should overwrite the existing configuration.
- When you next select SLCU_Wi-Fi you will be asked for your SLCU domain log in to start the network connection. You may need to include SLCU before your username, SLCU\user.name
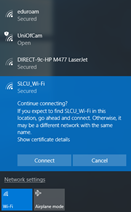
- On your first connection you may be shown a warning about checking the wi-fi. This is normal and when in the SLCU building it will be OK to click connect.
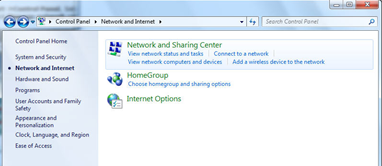
Click Start > Control Panel > Network and Internet > Network and Sharing Center
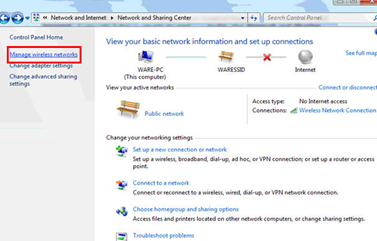
- Go to the Network and Sharing Center and click on Manage wireless networks on the left hand side.
- Click Add
- Click Manually create a network profile
- Under Network name:" enter SLCU_Wi-Fi and select WPA2-Enterprise under Security Type
- Click Next and then select Change connection settings
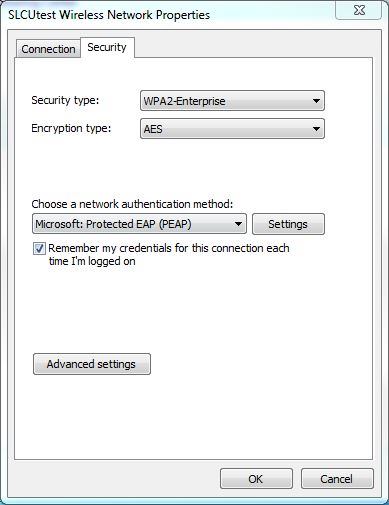
- Click on the Security tab and you should now see this window:
- If you now click on settings and deselect the Validate server certificate option at the top of the new window, you should now see this:
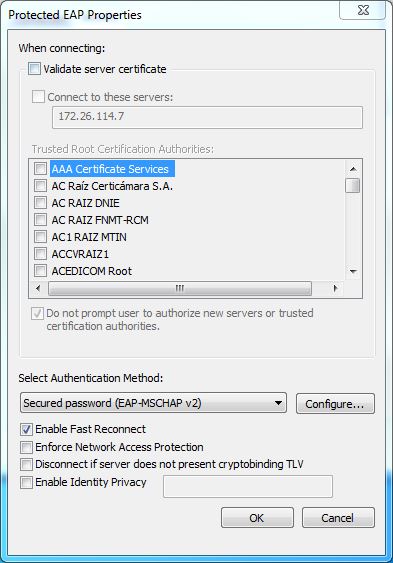
- The last thing to do at this window is to click Configure.. and deselect the option in the window that opens up. If you now click OK on these two windows, you should be back to the same window in step 6
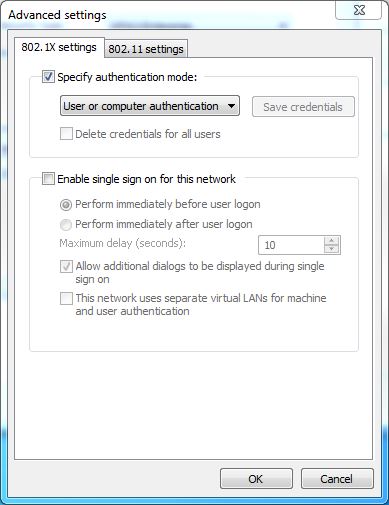
- The last change to make requires clicking on Advanced Settings and selecting the Specify authentication mode box so the window looks like the following:
- You can OK the windows that are open and try to connect to SLCU_Wi-Fi. If prompted for credentials, this will be your standard SLCU user login. If your computer is not on the SLCU domain you will need to put slcu\ before the user name.
Troubleshooting / FAQ
Why did this problem occur?
The SLCU_Wi-Fi network is delivered over wireless access points managed by University Information Services (UIS). This is to enable multiple wireless networks to be delivered; SLCU_Wi-Fi for SLCU staff and students, and UniOfCam for their guests. Unfortunately when the UIS renamed the SLCU network, they accidentally enabled security settings that should not have been enabled, causing some clients to receive certificate and security errors.
I am using a operating system not covered by your guides, and I am having problems connecting. What should I do?
Please contact the service desk on 36261, and we will help you.