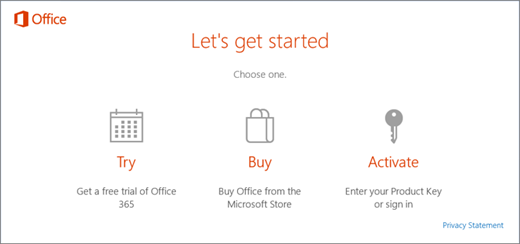
Office repeatedly prompts you to activate on a new PC
When you install a volume license version of Office Standard or Office Professional Plus on a new PC, you might be prompted with a Let's get started screen each time you start Office. This can happen if you don't uninstall the pre-installed version of Office on your new PC before installing a volume license version of Office.
To stop the prompts for activation, make sure your Office uses volume licensing and then update the registry.
Verify that your Office version uses volume licensing
Volume license versions of Office are typically used by large organizations. Here's how to check if your version of Office uses volume licensing:
Open a document in Word.
Go to File > Account.
Compare your screen to this screen shot and look for the following.
Volume license versions are named Office Standard or Office Professional Plus
Volume license versions have a Change Product Key link.
If you see buttons named Manage Account or Update Options, you're not using a volume license version of Office. For help with activating other versions of Office, see Activate Office 365, Office 2016, or Office 2013.
Update the registry to remove the activation prompt
Important: This task contains steps that tell you how to modify the registry. However, serious problems might occur if you modify the registry incorrectly. Therefore, make sure that you follow these steps carefully. For added protection, back up the registry before you modify it. Then, you can restore the registry if a problem occurs.
Close the activation window and all Office apps.
Right-click the Start button on the lower-left corner of your screen, and select Run.
Type regedit, and then press Enter. Select Yes when prompted to open the Registry Editor.
On the left side of the Registry Editor, under Computer, navigate to the following key in the registry:
HKEY_LOCAL_MACHINE\SOFTWARE\Wow6432Node\Microsoft\Office\16.0\Common\OEM
Right click the OEM value and click File>Export.
Save the key.
After the key is backed up, select Edit>Delete.
Repeat steps 3-6 for the following key:
HKEY_LOCAL_MACHINE\SOFTWARE\Microsoft\Office\16.0\Common\OEM
Close the Registry Editor and start Office again.

