Microsoft Teams - Record a Meeting (Windows)
Introduction
Microsoft Teams supports recording of meetings, and even auto-transcription of audio into text (for English and Spanish only at the moment), which then becomes searchable and will take you to that location in the video.
By default the video is shared with anyone who was invited to the meeting, we have instructions on sharing it with others further down.
Recording Permissions
Warning! Recordings are stored online on the Microsoft Streams website. It is possible for the University Office 365 admins to view any recording. Please bear this in mind before recording a meeting where sensitive information is discussed.
Requirements
In order to record a Teams Meeting you must be using the Teams Desktop Client - the web-app does not allow you to record the meeting, although a meeting can still be recorded if someone joins the meeting using the web-client.
Instructions
Once you are in a Teams Meeting (we have instructions on "Creating a Teams Meeting" and "Joining a Teams Meeting") anyone using the Teams Desktop Client can record the meeting.
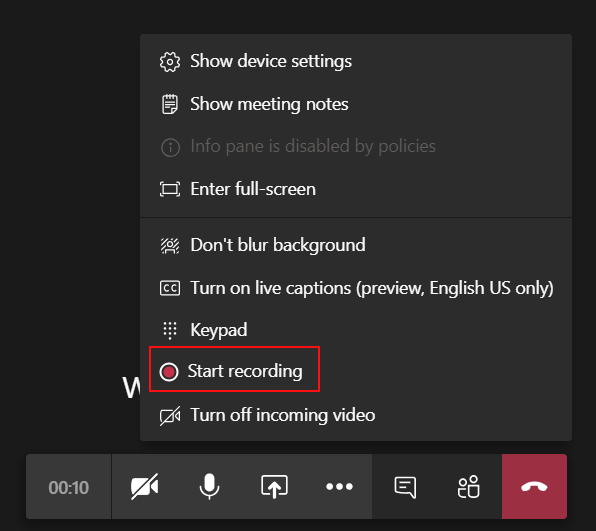
- Once in the meeting, click on the ellipses in the middle of the window:

- This will pop up a small menu, click on "Start Recording":
- You will now see a banner appear at the top of the window warning you the call is being recorded - everyone on the call will get a warning saying it is being recorded, and anyone who joins later will also get a warning:

- You will also see a small red icon appear beside the timer, to indicate the meeting is being recorded:

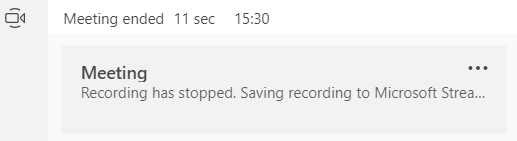
- Once the meeting is completed, you will get a notification in the Teams Chat for the meeting that it has completed and is being "Uploaded to Microsoft Stream":
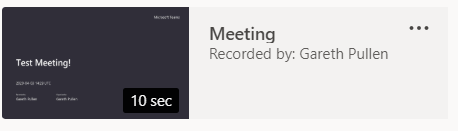
- Depending on the length of the meeting, this can take some time. Once it has been uploaded the notification changes to instead be an embedded version of the recording:
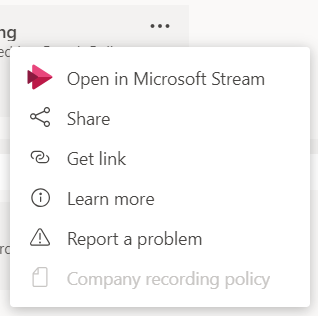
Once it has been uploaded, you can view the video in Teams by clicking on it, or in Stream by clicking the ellipses beside the title, and clicking on "Open in Microsoft Stream":
Share
Warning! The "Share" button in that menu will share the video with the entire Cambridge University group. By default the video is shared with all meeting attendees - if you wish to share it with other people or groups, please see the section on "Sharing" below.
Auto Transcription
Microsoft Stream (where the videos are automatically saved to) supports auto-transcription of audio from the video, making a searchable transcript of the video - you can search for a word or phrase, click on the result, and it will take you to the location in the video where that was said.
To enable auto transcription:
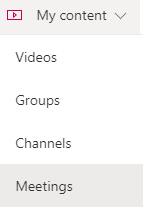
- First you need to open the video on the Streams website. If you were invited to the meeting, you can find it in your Teams Chat, click the ellipses beside the title, and click on "Open in Microsoft Stream". If you have been sent a link in an email, you can follow that directly to the video, or you can go to the Microsoft Streams website directly (https://web.microsoftstream.com/), click on "My Content" and then "Meetings":
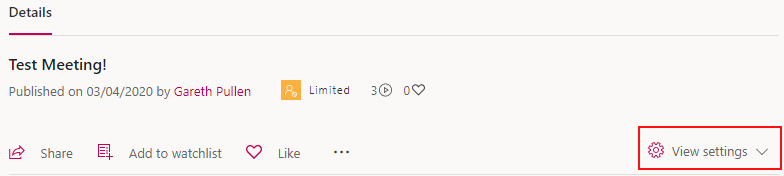
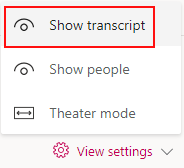
- Once you have found the video, to enable auto-transcription you need click on "View Settings" and then "Show Transcript":
- Once you click on "Show transcript" a new tab will appear on the right beside the video, but there will be no text yet - it takes a little while for it to process the audio and produce a transcript.
The transcription is not 100% accurate however: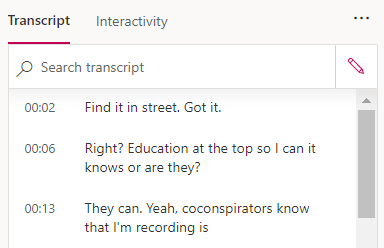
We actually said "Find it in streams... Got it." "Right. I got a notification at the top so it knows, or I can... Co-conspirators know that a recording has started"
The Owner of the video (the person who recorded it) can edit the transcription before it is shared by clicking the pencil icon beside the search. Once the recording is shared however editing is disabled.
You can also search the transcription for a particular word or phrase, and then clicking on the result takes you to that location in the video.
Sharing a Recording
So you've now got a meeting recorded, you have a transcription, but you want to share it with someone who wasn't on the meeting (to share it with a Group, see the next section on Editing Permissions).
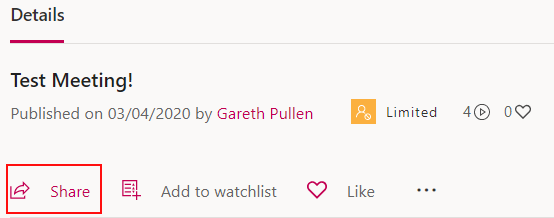
- Find the meeting on the Microsoft Stream website
- Under the video is a "Share" button, click on that:
- This will pop up a new window:
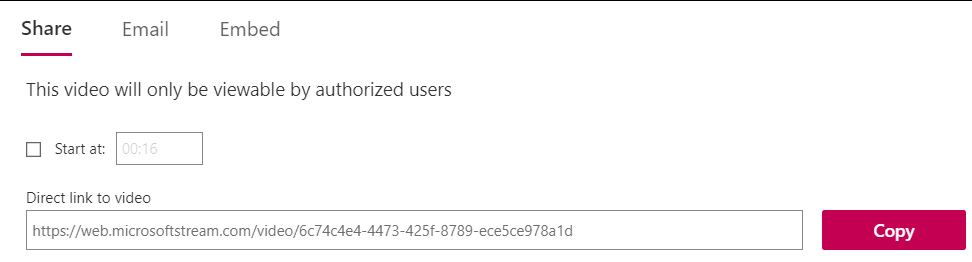
- You can copy the link directly from that window, but it will only be viewable by those who already have permission (i.e. it's already been shared with, or were invited to the meeting). To share with anyone else, you need to click on the "Email" button at the top, and then search for their name:
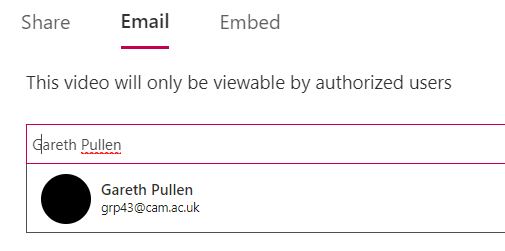
- Click on the result to add them to the list - if you decide you don't want to share it with that person, you can click the "X" beside their name. You can add additional people by searching again after you've clicked to add one. Once you are happy with the list of people to send it to, you need to click the "Send and Close" button at the bottom of the window.
- An email with a link in will then be sent to the people you've selected.
Change permissions on a shared recording & Share with a Group or Channel
If you find you need to remove someone from the permissions, or want to share it with an entire Group rather than individuals, you can do that too!
- Find the video in Microsoft Streams
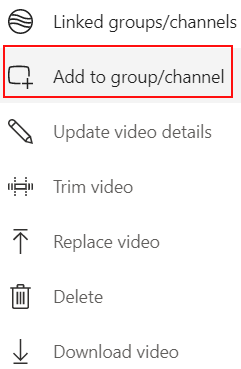
- Click the ellipses beside "Like":

- Click on "Add to Group/Channel":
- This will pop up a new window, where you can view permissions you have already set, and share with a Group or Channel using the search box at the top:
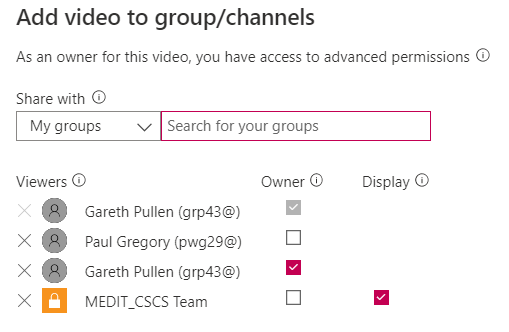
- Clicking the "X" beside any entry will remove that person / group / channel's permission to the video.
The icon beside the name indicates if it is a person or a Group.