/
Accessing the SDHS
Accessing the SDHS
- Martin Keen
- Dave Clarke
- Craig Tolley (Unlicensed)
Owned by Martin Keen
This guide is for Data Managers needing to access the Secure Data Hosting Service to store and work with sensitive personal data. External Collaborators should see the documentation on the SDHS Transfer Service - General Information
Requirements
- A working internet connection - the SDHS can be accessed onsite or offsite.
- A device with Citrix Receiver installed. If Citrix Receiver is not installed either you or your IT Administrator will need to install it. It is installed on CSCS supported PCs by default. Please note that the version of the Citrix Receiver must be 4.7 or above. Older versions will not work with the CSCS environment.
Guide for Windows, Ubuntu and Mac OSX Devices
Go to the SDHS Website
- Browse to https://securemints.medschl.cam.ac.uk. If you are using Google Chrome, see the FAQ below about accessing the service.
Installing Citrix Receiver
Citrix Receiver is required to enable the remote virtual desktop used by this service. It is a browser plug in that adds browser functionality. CSCS supported computers should already have this installed, otherwise follow these steps:
- Use the link provided at the bottom of the login page. If you try to login without the plugin installed, you will be prompted to install it.
- Once the client has been downloaded you will need to install and activate it which may require an administrator password.
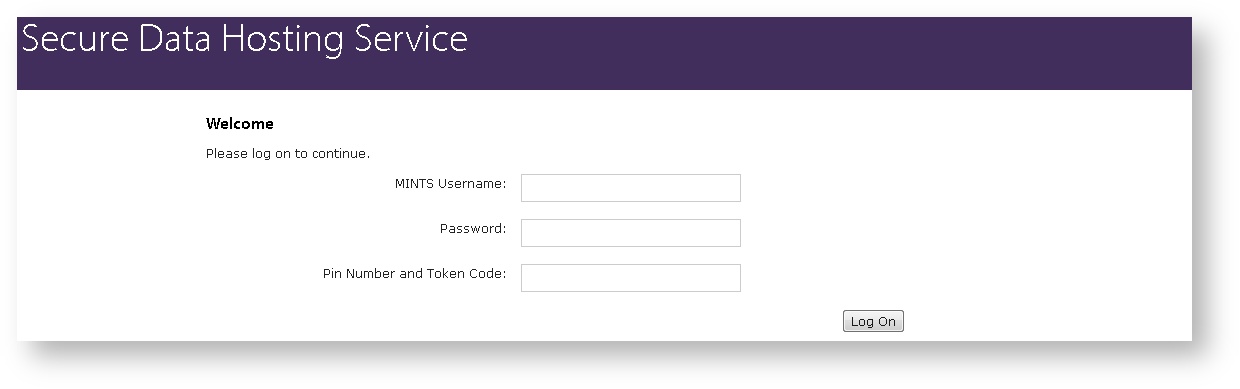
Logging on to the SDHS
You will need the Signify 2-Factor Authentication token that was provided to you when your study was added to the SDHS. If you do not have this, then contact the Service Desk.
- Enter your MINTS username and password.
- Enter the code from the 2-factor authentication token:
- If you have a hardware/physical token, enter your Pin Number (you would have chosen this when setting up your token) followed by the Token Code (the number on the dongle)
- If you have a software token, enter the Token Code only
- You will see the following page, indicating that a Windows 10 Virtual Desktop is ready to launch.
- If a Virtual Desktop does not launch automatically, then click on the above icon.
- You may be prompted that the Citrix Receiver plugin is disabled or blocked, often with an option to allow it to run. Please click allow/trust as appropriate to start the application.
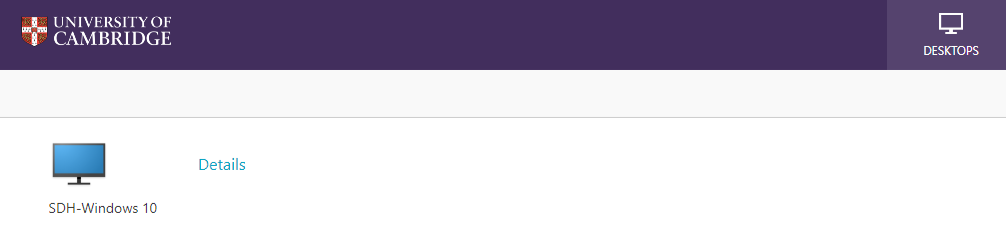
Soon a Windows 10 desktop will launch.
If you encounter any problems, see SDHS Troubleshooting
, multiple selections available,