Introduction
You can configure your email to automatically send response messages. This is helpful for when you are on holiday, out of the office, or in the process of phasing out an email account.
Instructions
- Sign in to webmail using the following URL - http://outlook.office.com/
- In the top-right corner, next to your name, select the cog icon and then search for automatic replies

- You will be immediately taken to the automatic replies page:
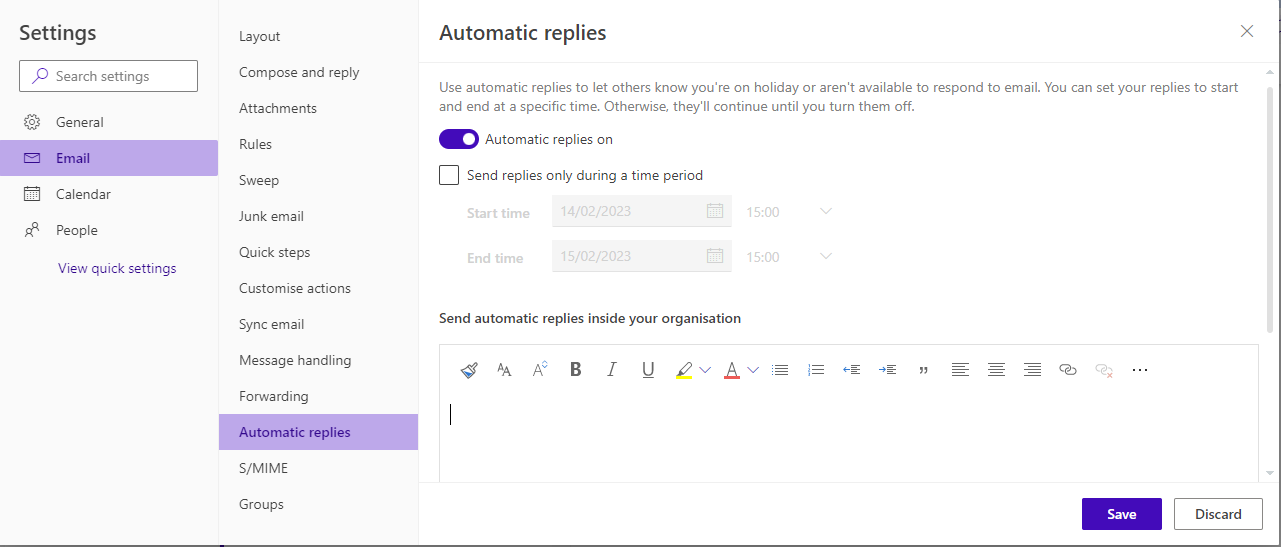
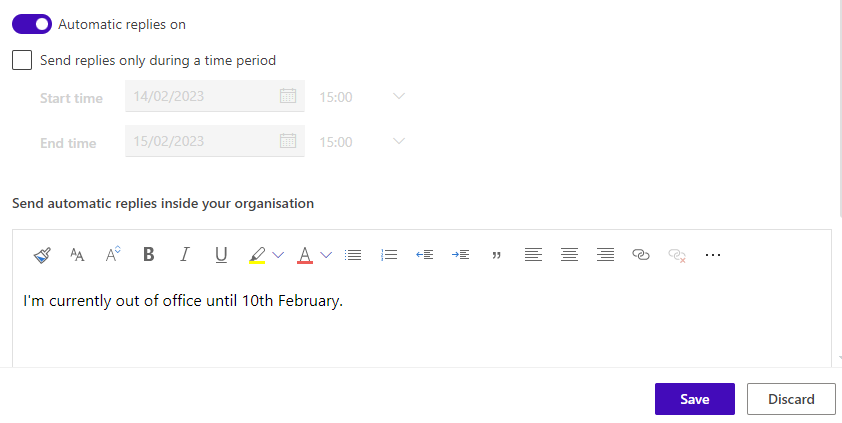
- For a basic automatic response, select the Automatic replies radio box, leave the time period check box unticked, and enter the message you wish people to receive. The first text box allows you to set a message that will be received by colleagues within the same organisation.
- You can also configure a response to people outside of your organisation using the second text box below the first. This can be the same response if you wish, or something slightly different. To turn this on, check the box for Send replies to outside my organization and choose if you wish to send to all or only to people in your contacts list.

- When you are finished and wish to turn on the automatic response, select the save button at the bottom left. This will turn on your automatic replies immediately.
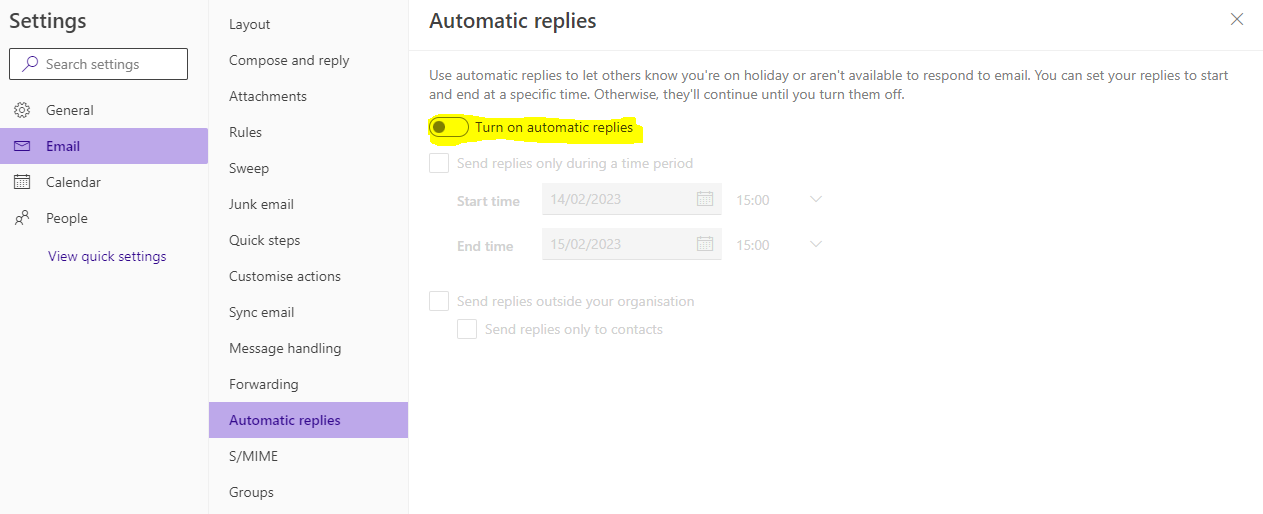
- To turn off automatic replies, toggle the option to Turn of Automatic replies.
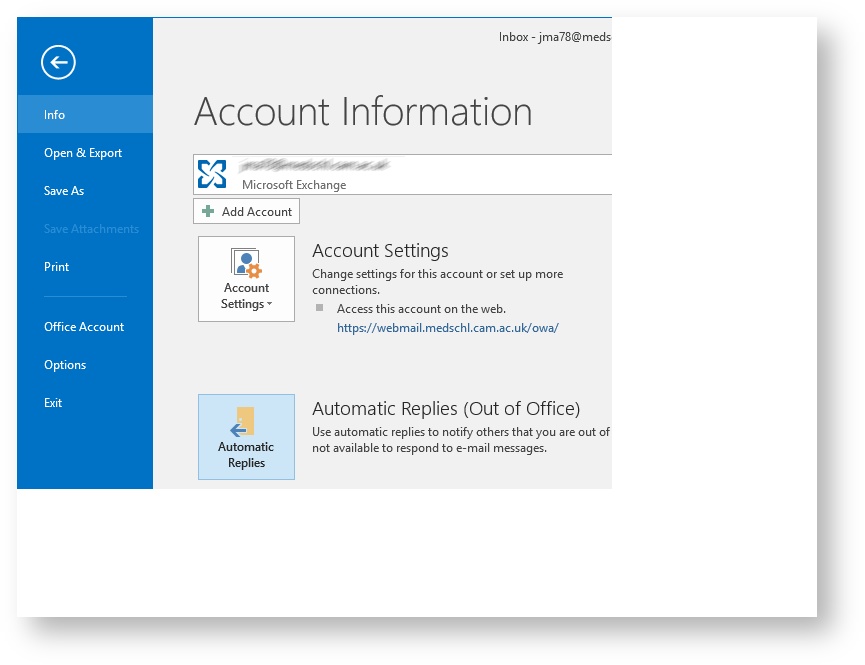
In Outlook 2019/365, click "File" tab, on the left, "Info" is selected by default (if not, click to select it), then click "Automatic Replies" button in the middle.
The "Automatic Replies" window pops up, by default "Do not send automatic replies" option is selected.
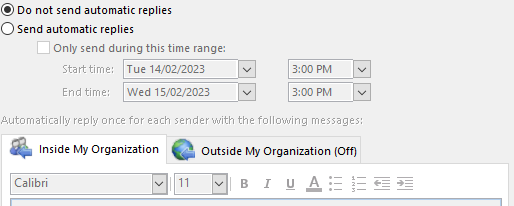
Click the radio button for "Send automatic replies" option.
- Define a start time and an end time for how long the auto message will apply.
- Under "Inside My Organization" tab, compose your message in the text field. You can format the message in any way that you want.
- You can also add more specific conditions by clicking the Rules... button
When you're done with the message, if you click "OK" button, you'll get a warning message:
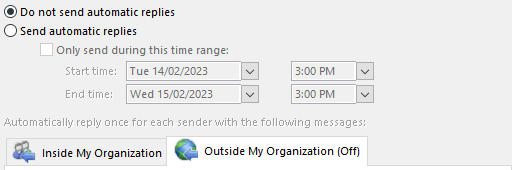
Click "Outside My Organization" tab:
- If you want people outside of the organisation to receive an auto-reply, type in a message (could copy and past from previous message or compose a different one). Choose whether you would like to send an auto reply to each person who sends you an e-mail message or only to people who are listed in your Contacts.
- If you do not want outside people to receive an auto reply, uncheck "Auto-reply to people outside my organization" option.
Click "OK". An auto reply will be sent to people who email you during the time that you defined above.