Zoom - Recordings
- Jennifer Allan
- Kathy Downham
- Charlie Le Vine (Unlicensed)
Introduction
Zoom meetings can be recorded for viewing later. Recordings include audio, video and chat text. You can record meetings and save them in the Zoom cloud or locally and then move them to a network drive, OneDrive or Dropbox or a similar file sharing service. A minimal amount of Zoom cloud recording space is provided with our account but it is expensive to add more so all accounts affiliated with the Clinical School account will have a 90 day retention date set on recordings. 90 days after a meeting has been recorded, any recordings will be deleted automatically so it is important that recordings be moved away from Zoom cloud if they need to be retained.
Requirements
Zoom account under the UIS or School of Clinical Medicine
Instructions for Meetings
Meeting recordings should not be stored in the Zoom cloud for long. If a meeting needs to be stored for a few days in order to capture meeting minutes it is fine to leave them on the Zoom cloud but they should be quickly deleted to ensure that there is sufficient space for other meetings to be saved. If they need to be shared or referenced longer term, please follow the Move a Recording to OneDrive section.
If you are logged in to a meeting room or shared computer do NOT follow these instructions. If you are regularly recording meetings from a personal comptuer logged on with your username you may wish to record them locally as a default. Zoom does not recommend setting your recordings to automatically save to a network drive or cloud storage like Dropbox or OneDrive as your recordings may become corrupted. They strongly suggest that recordings be saved locally and then moved. To do this:
- In Windows
- In Windows File Explorer
- Scroll down to the Local Disk (C:) section
- Right click Local Disk (C:) and select New and then click on Folder
- A folder called New folder will be created. Right click on it and rename it to Zoom Recordings
- Open up the Zoom desktop client
- Click on the Settings cog icon on the right side of the Zoom window
- Click Recording
- Under Local Recording click Change
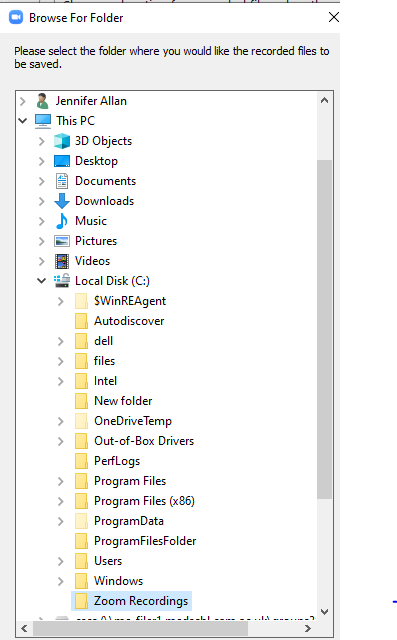
- A Browse for Folder window appears. Scroll down the list to This PC and expand Local Disk (C:), then click to select the folder you just created
- Exit from the Zoom client
- In Windows File Explorer
Use the Record on this Computer option to avoid saving meetings to the Zoom cloud.
- Start a Zoom meeting as the host.
- Click Record
 .
. - If there is a menu, select Record on this Computer.
Hosts will see the following recording indicator in the top-left corner while recording is active.
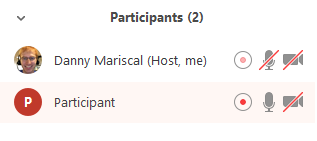
Participants will see the following indicator in the top-left corner while the recording is active.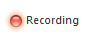
- Click Participants to see which participants are currently recording.
Note: Dial-in participants will hear a message informing them that the meeting is now being recorded unless disabled by the host. - After the meeting has ended, Zoom will convert the recording so you can access the files.
- Once the conversion process is complete, the folder containing the recording files will open.
Note: By default, the recording files are formatted a certain way. The audio/video file (MP4) will be named video[random number].mp4. The audio only file (M4A) is named audio[random number].m4a.
In order to share a Zoom Cloud recording in OneDrive please complete the following steps to download the file from Zoom, upload the file to OneDrive, and share with other users.
Download the file from Zoom:
Access your Zoom Cloud Recordings by going to https://zoom.us/ and logging in with your Zoom account.
Select Recordings from the column on the left and Cloud Recordings from the center option.
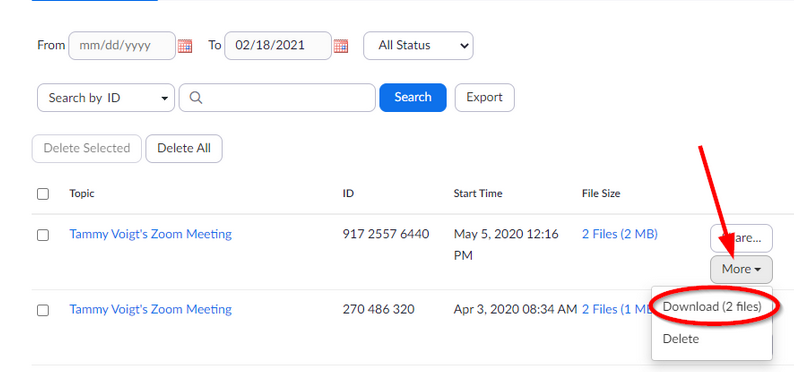
To the right of the requested recording select More then Download to download the recording to your desktop.
You may see a dialogue box appear stating Zoom is attempting to download multiple files if so select Allow.
Click on the small up arrow to the right of the downloaded file and choose Show in Folder to view the recording in file explorer.
Zoom may download several options; one with just audio, another with video, and the full recording. Be sure to select the full recording in the file format of mp4 when continuing.

Upload the File to OneDrive:
If you have the OneDrive client installed on your computer you can right click on the file name and select Move to OneDrive

Alternatively, you can sign in to OneDrive by going to https://www.office.com/ and selecting the OneDrive icon from the column on the left.
Select Upload>File and choose the downloaded zoom recording file from the file explorer pop up box.

Share the OneDrive file:
Once your file has been uploaded to OneDrive select the file and choose Share

You can manage access for users by selecting People you specify can view and changing the settings to meet your needs.
Be sure to click Apply and Send to share your file.
In order to share a Zoom Cloud recording in OneDrive please complete the following steps to download the file from Zoom, upload the file to OneDrive, and share with other users.
Download the file from Zoom:
Access your Zoom Cloud Recordings by going to https://zoom.us/ and logging in with your Zoom account.
Select Recordings from the column on the left and Cloud Recordings from the center option.
To the right of the requested recording select More then Download to download the recording to your desktop.
You may see a dialogue box appear stating Zoom is attempting to download multiple files if so select Allow.
Click on the small up arrow to the right of the downloaded file and choose Show in Folder to view the recording in file explorer.
Zoom may download several options; one with just audio, another with video, and the full recording. Be sure to select the full recording in the file format of mp4 when continuing.
Move the File to a Home or Network Drive:
From within Windows File Explorer you can drag the file from your Downloads folder to your U or V drive.
Instructions for Undergraduate Teaching Sessions
If you are recording teaching sessions do not change your settings to save the meeting to the local computer and let it save to the Zoom Cloud
Advise the eLearning team via an email to vle-support@medschl.cam.ac.uk once the session is complete and they will move it to Vimeo and embed in MedEd for future reference.
Instructions for Postgraduate/MPhil Teaching Sessions
If you are recording teaching sessions do not change your settings to save the meeting to the local computer and let it save to the Zoom Cloud.
Once the recording has been completed, download to an accessible location and then add to Moodle.