Printing - Selecting Duplex as default
- Martin Keen
- Dave Clarke
- Oskar Lukasik
Introduction
As an environmentally conscientious institution, the University encourages all departments to set their printers to print Duplex (double-sided) by default. Most printers however, default to print single sided. All printers that are managed via CSCS print servers will be set to print Duplex by us. However, if you have a personal printer, or are printing directly to a printer (common for Macs) then you will have to adjust your default printer preferences yourself.
How this is done will depend on your computer OS (e.g. Windows 10, Windows 11, OSX, MacOS) and the printer manufacturer (HP, Konica Minolta, Xerox, etc). Despite being a seemingly simple task, it does seem that some companies make it unnecessarily difficult!
This guide aims to show you how, or at least give you an idea of where, to find the settings you need to make duplex your default setting.
In Windows we must edit the settings for the print queue:
Open the Printing Preferences
Windows 10
- Open the Start Menu
- Go to Settings
- Open Printers and Scanners
- If your printer has the a name like "imspr01 on me-print" then it is a managed print queue and the default settings are managed by CSCS, and you don't need to do anything
- If your printer has a name imspr01 then it is a direct queue, and you control the default settings
- Click on the printer name
- Click Manage
- Click Printing Preferences
- The print driver properties will now open - go to Changing the Default Printer Settings, below
Changing the Default Printer Settings
Most printer drivers use the concept of profiles or shortcuts. Here we must be sure to change the default settings, not just the current settings. The interface is different for different brands of printer:
HP
You must edit the settings for any of the shortcuts (profiles) that you use:
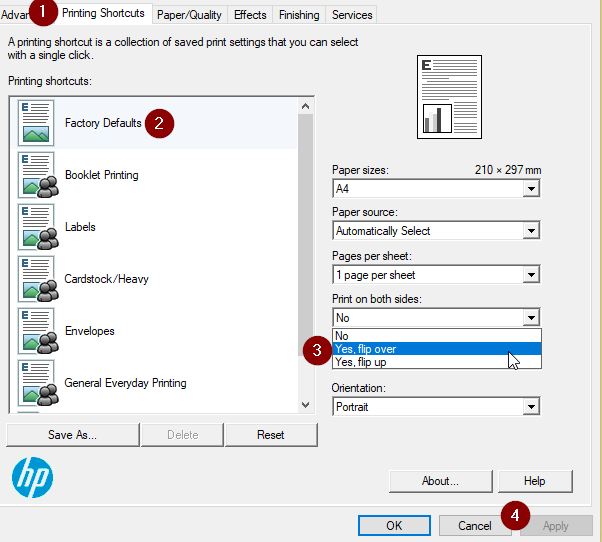
- Open the Printing Shortcuts tab
- Click the Factory Defaults shortcut
- On the right, change Print on both sides to Yes, flip over
- Click Apply
- If the are any other shortcuts (presets) that you use, do the same for them
- You are done.
Konica Minolta
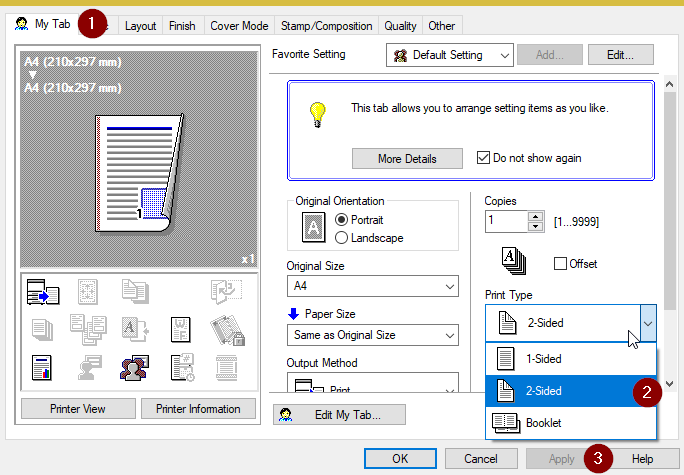
- Click My Tab
- On the right, change Print Type to 2-Sided
- Click Apply
Sharp
You cannot edit the Factory Defaults profile, so must create an edited profile to use:
- Open the Main tab
- Click 2-sided (Book)
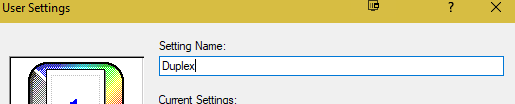
- Click Save...
- Give your edited profile a new name, e,g, Duplex
- Click OK
- Click Apply
- When printing, be sure to use the Duplex profile.

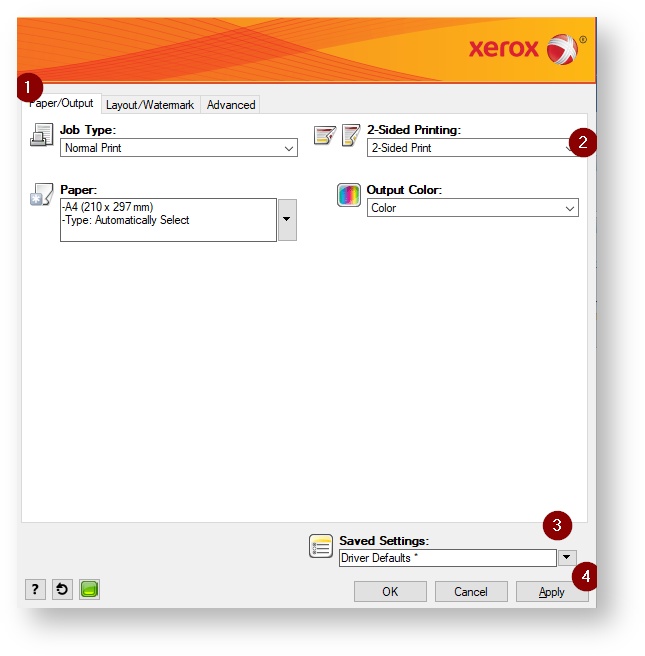
Xerox
- Click on the Paper / Output tab
- Select 2-Sided Print
- Under Saved Settings choose Save As... and give the profile a new name, e.g. Duplex
- Click Apply
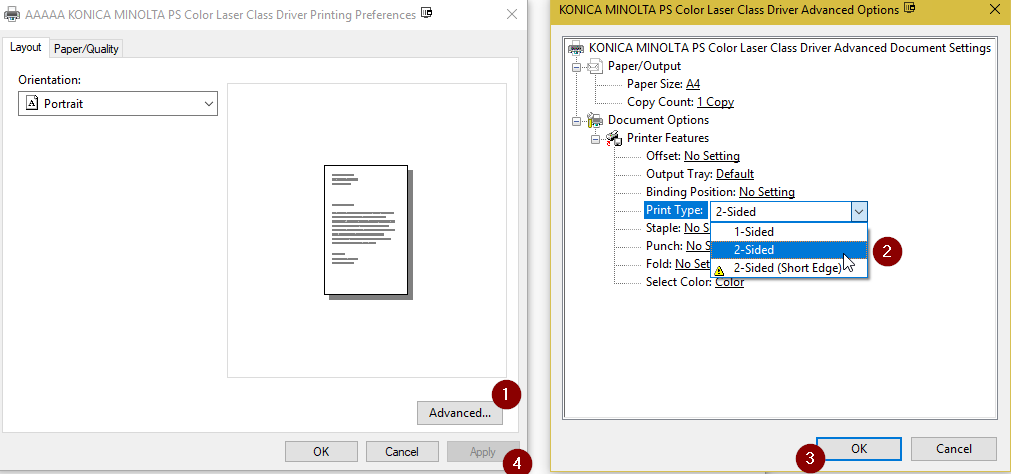
Generic Windows Driver
- Click Advanced
- For Print Type, select 2-Sided
- Click OK
- Click Apply
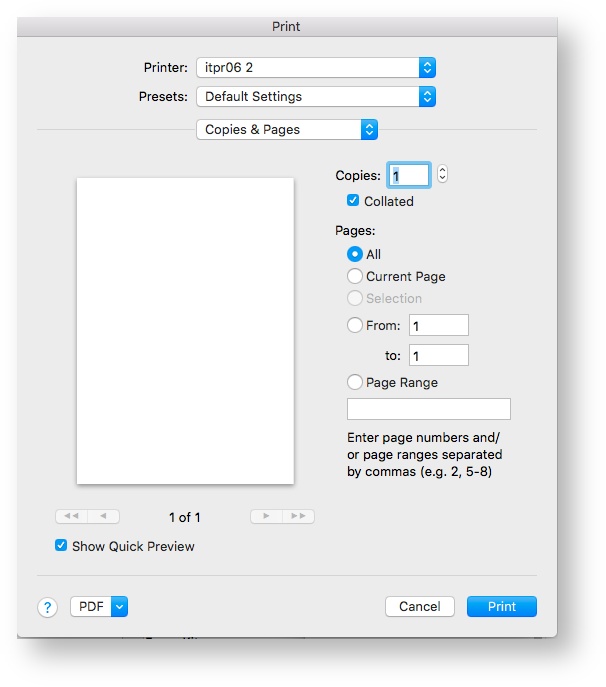
On Macs the print options are selected during the printing process, and are separate for different applications. The steps below are for Word 2016 and show how to update your settings and save them as the default.
- After selecting print or pressing cmd + p on the keyboard you will be presented with this window
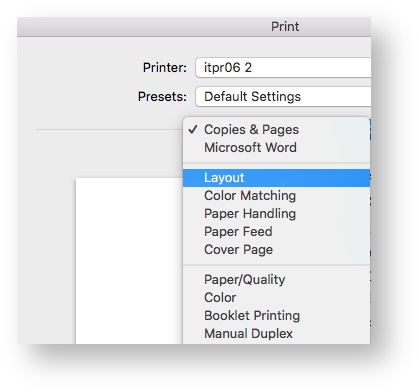
- Please click on the Copies & Pages drop down and select Layout from the drop down menu
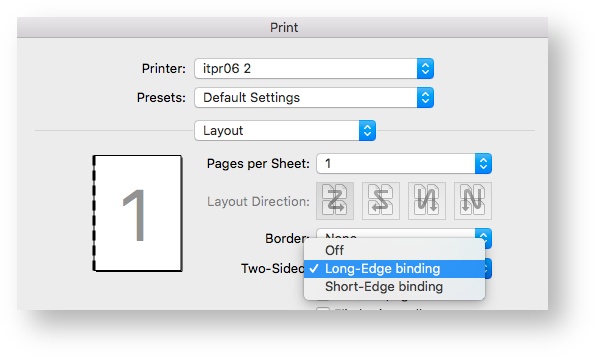
- In the Layout menu select 'Two-Sided' option and from the drop-down menu select Long-Edge binding
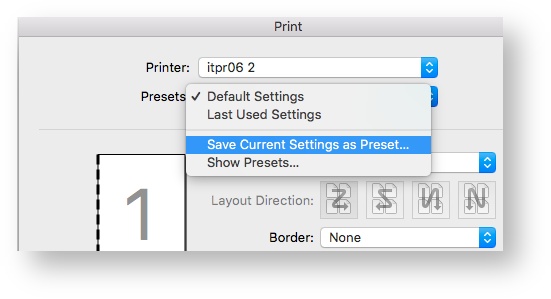
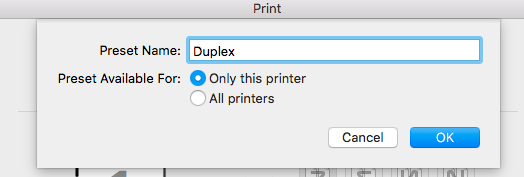
- Still in the layout menu select 'Presets' and the 'Save Current Settings as Preset...'
- Change the name for preset and press OK
- In order for this setting to save as default select it from drop-down menu of presets and print a job -
after this first print it will save as a default and from now on it will be selected at all times.