/
Creating a Signature in Outlook
Creating a Signature in Outlook
Introduction
This page provides instructions on setting up a Signature in Outlook
Requirements
You must have signed in to and configured Outlook before you can configure a signature - for instructions on doing so please see Setting up Outlook (Office 365)
Instructions
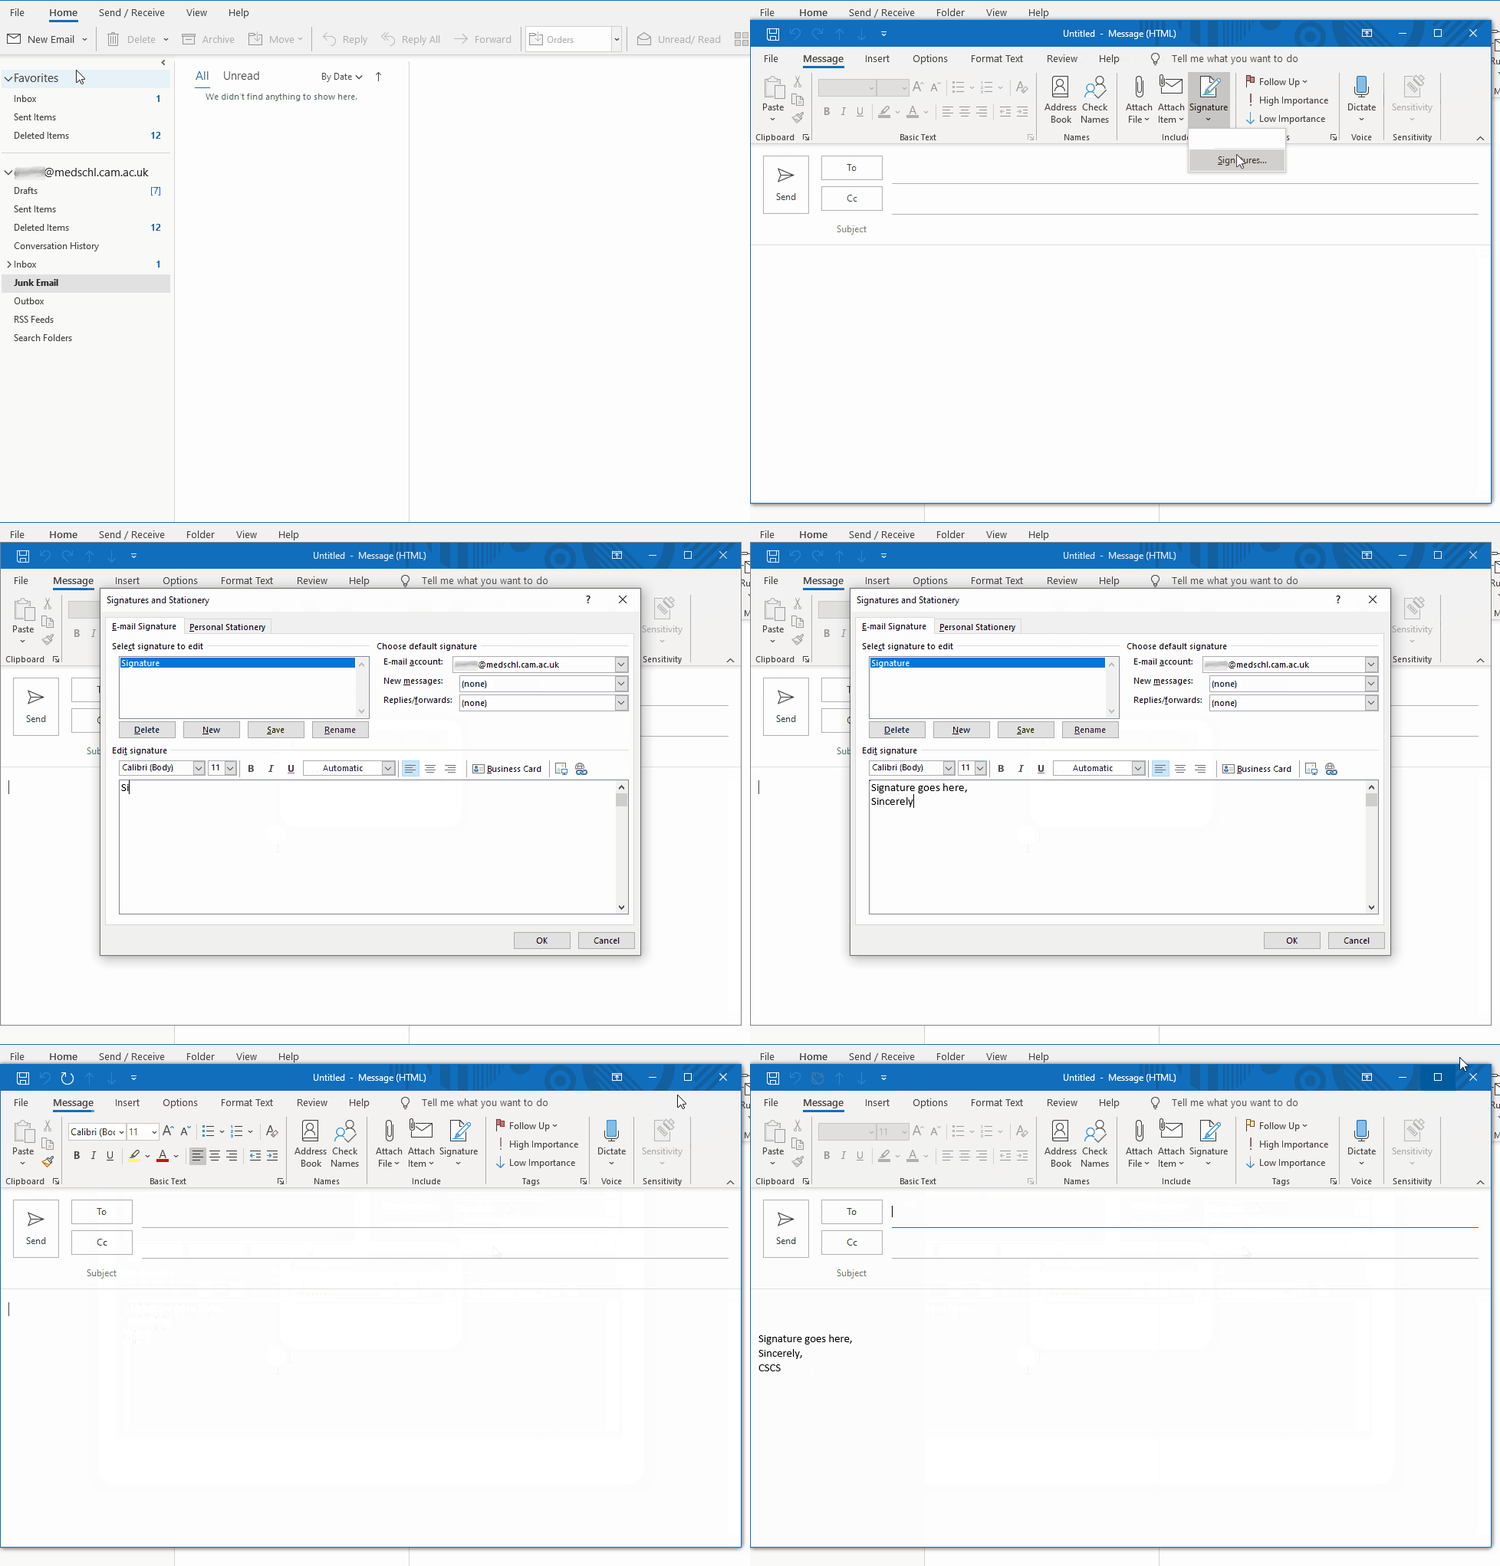
- Open Outlook
- Click "New Email"
- Click on "Signature" and then "Signatures..." in the drop-down menu.
- If you do not see the "Signature" icon, you may have the "Simplified view" in Outlook, click on "Message" and then click the small down-arrow to expand the toolbar
- Click "New" and enter a name for this signature
- You will now be able to enter text into the large box in the Signature window (you can copy & paste into the box, including images)
- Once you have entered your signature, ensure it is set as both the "New Messages" and "Replies / Forwards":
- Click "OK" to save the Signature.
Please see this short video demonstrating the process:
Related content
Autocomplete Email Addresses in Outlook
Autocomplete Email Addresses in Outlook
More like this
Mailbox Rules
Mailbox Rules
More like this
Create a new Outlook Profile for Exchange Online
Create a new Outlook Profile for Exchange Online
Read with this
Setting Up Outlook on a Windows Device
Setting Up Outlook on a Windows Device
More like this
How to forward an email as attachment in Outlook or Webmail
How to forward an email as attachment in Outlook or Webmail
More like this
Creating and Adding Outlook Archive Files
Creating and Adding Outlook Archive Files
More like this

